Clay 101: Beginner Tools & Techniques
Author: The Art Shed Team Date Posted:7 August 2025

Clay for Beginners: Everything You Need to Know (No Kiln? No Worries)
Thinking about diving into clay but not sure where to start? You’re not alone. Every month, beginner artists search phrases like best clay for beginners, can I do pottery at home without a kiln, air-dry clay vs polymer clay, and how do I stop my clay from cracking? It can feel like there’s a whole secret language around clay, but we promise, it’s not as scary as it sounds.
Whether you're keen to hand-build your own mug, sculpt a tiny charcuterie board from polymer clay, or make a slab-built trinket tray for your best mate’s birthday, this beginner clay guide will cover it all. We’ll walk you through the types of clay, how to start without a kiln, easy techniques like pinch pots and coils, tool must-haves, clay care, and what to expect, with plenty of beginner mistakes, cheeky Shed tips, and inspo ideas thrown in. So roll up your sleeves and get ready to squish, sculpt, roll, and maybe even yell “oh no” into the void a couple of times. You’re officially entering the world of clay.
What Clay Should I Use as a Beginner?
Let’s clear this up straight away: you absolutely can start making with clay at home, even if you don’t have a kiln or a pottery wheel.
Air-Dry Clay
Air-dry clay is the go-to for people who want that real clay feel without needing to fire anything.
It dries over 24–72 hours, can be painted with acrylics, and is great for things like incense holders, trinket dishes, vases (decorative only), or sculpture. It’s soft, natural, and super intuitive to work with. For total newbies, we love Mont Marte’s Air-Dry Clay range available in classic White and warm Terracotta. It’s smooth, reliable, and dries to a firm finish without firing.
If you’d rather grab everything in one go, check out our Beginner-Friendly Air-Dry Clay Sculpting Kit; it comes with clay, tools, and step-by-step guidance to get you squishing straight away
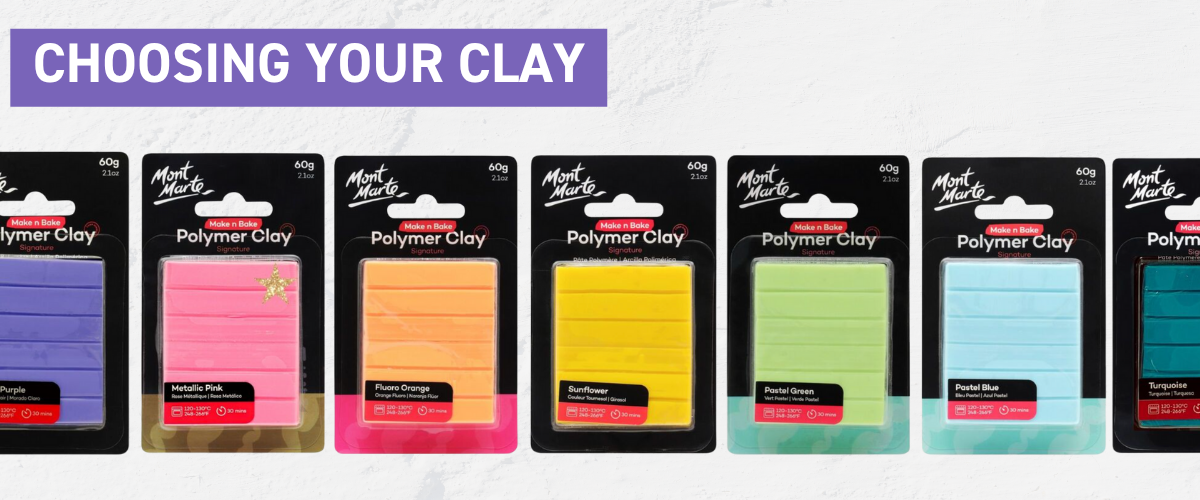
Polymer Clay
Polymer clay is the queen of crafty cuteness. You bake it in your regular oven, it comes in every colour under the sun, and it’s perfect for jewellery, miniatures, cake toppers, keyrings, or functional little pieces like ring dishes.
It’s more plasticky than traditional clay, but insanely satisfying to work with. For absolute newbies, we steer you towards Fimo Polymer Clay, it comes in both Soft and Effect finishes, so you can play with everything from classic pastels to shimmering metallics. If you’re after a more budget-friendly option that still delivers creamy, easy-to-condition clay, our Mont Marte Polymer Clay range has you covered. For one-stop simplicity, grab our Polymer Clay Starter Set, which bundles a rainbow of clay bars with all the essential tools to kickstart your sculpting journey.
Stoneware, Earthenware & Raku Clays
If you’re dreaming of functional mugs, plates or studio-level ceramic art, you’ll want a kiln-fired clay body. Low-fire earthenware is fantastic for bright glazes and sculptural pieces, mid-fire stoneware gives you a tough, dishwasher-safe finish, and raku clay is your go-to for that dramatic crackle and metallic glaze look (you will need a raku or electric kiln).
We recommend Northcote’s White Handbuilding Raku Clay for anyone keen to experiment with raku techniques, grab it here and take your first firing studio class with confidence.
Tips From The Shed: Don’t be shocked if your polymer clay feels stiff straight out of the pack. Warm it up by rubbing it between your hands, or cut it into smaller pieces and knead. If it’s still tough, try a pasta machine or clay conditioner to get it smooth and squishy. It’s meant to start hard so it holds its shape later.
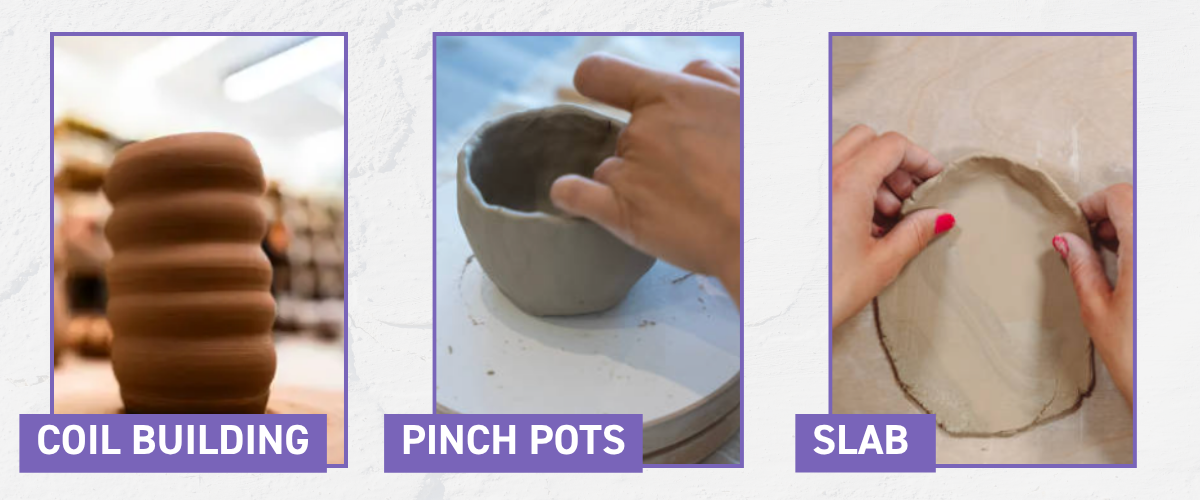
Beginner Clay Techniques: Pinch, Coil, Slab
There’s a reason most clay classes start here. These three hand-building techniques are essential for learning to work with the material, controlling moisture, and transforming a lump into something you’re proud of.
Pinch Pots
This technique is meditative magic. You take a ball of clay, push your thumb into the centre, and start gently pinching around the edges while rotating in your palm. The goal is an even thickness all around, usually 1 cm thick.
It’s simple, satisfying, and beginner-proof. You can use this method to make bowls, cups, tealight holders, or stackable sets. You’ll learn pressure control, wall shaping, and how not to overwork wet clay (trust us, everyone makes a few over-poked pancakes first).
Coil Building
Coils are rolled-out ropes of clay that you layer up and smooth together to build forms. You can make mugs, vases, incense towers, bowls, and some wild wiggly sculptures.
Coil building teaches you how to control shape and height, and if you leave the coils exposed, it adds a lovely rustic aesthetic. It’s slower than other techniques, but helps you understand structure and balance like a pro.
Slab Construction
This is your go-to for flat-bottomed pieces like trays, boxes, wall hangings, or mini shelves.
Roll out a slab using a rolling pin (or acrylic roller), cut your shapes, and join them using scoring and slip (a clay + water paste). You can emboss patterns, press flowers or stamps into the surface, and make everything from earring display stands to tile art. Just don’t rush drying, slabs like to warp if they’re handled too soon.
Tip From The Shed: If you’re using air-dry clay for any of these techniques, make sure you dry pieces slowly and flip them to prevent warping or cracking.
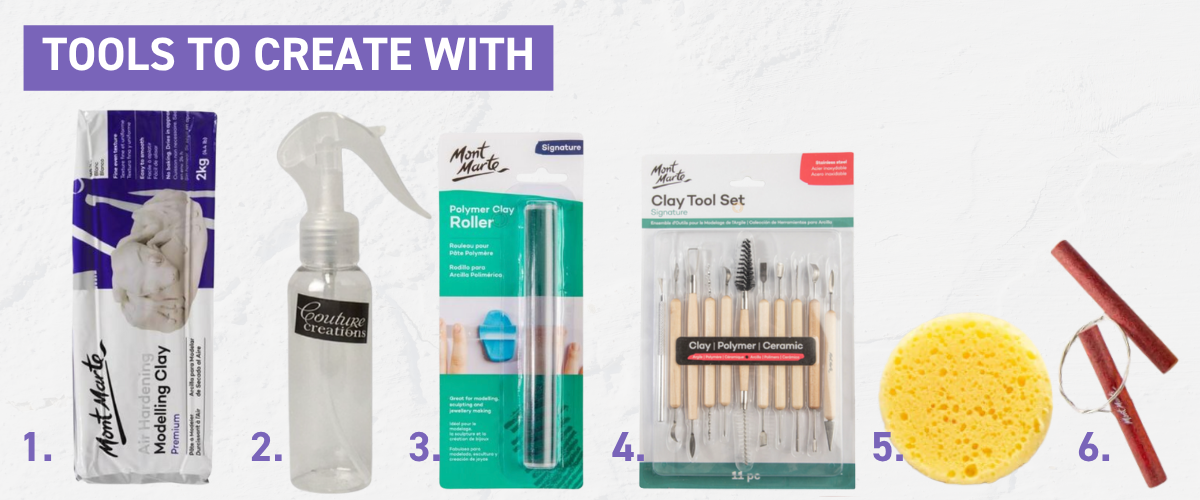
Tools You Actually Need to Start
No, you don’t need a full pottery studio. Here’s what you do need, whether you're using polymer, air-dry, or traditional clay.
A decent-sized chunk of your chosen clay (Mont Marte and Sculpey are fab starter brands)
A flat work surface, protected with a non-stick mat
An acrylic roller or rolling pin
A blade or wire cutter
A sponge and spray bottle to keep your clay moist (only for air-dry/traditional)
Something to poke and carve—like a needle tool, skewer, or toothpick
Polymer clay bakers: you’ll also want baking paper, a tray, and ideally an oven thermometer
Optional fun things: texture rollers, shape cutters, dotting tools, or a pasta machine (great for softening polymer evenly).
Tips From The Shed: Keep a box of alcohol pads handy when working with polymer clay to clean tools or wipe lint and dust off before baking. Game-changer.
How Long Does It Take to Finish a Clay Piece?
Air-dry clay: 1–3 days to dry fully before painting or sealing.
Polymer clay: Bake in under 30 minutes, depending on thickness (follow brand instructions)
Traditional clay: 10–14 days for the full process, including drying, bisque firing, glazing, and final firing
The biggest beginner trap? Rushing it. Slow drying = less cracking. Be patient, and your work will thank you.
.png)
Finishing and Painting Your Pieces: Varnish Deep Dive
Once your piece is dry (air-dry) or baked (polymer), you can sand any rough edges and paint with acrylics. Seal your work using a gloss or matte varnish for that pro finish. Air-dry clay needs sealing if it's going to be handled or displayed in humid environments. Polymer clay doesn’t always require sealing unless you want a glossy or matte effect. Art Shed stocks Mont Marte varnishes that work on both types of clay and Artist Acrylics for maximum colour pop.
Gloss Varnish
If you want colours to pop and a mirror-like sheen, go gloss. It’s ideal for jewellery and colourful trinket dishes, think those polymer clay earrings that need sparkle. Mont Marte’s water-based gloss varnish dries crystal clear and resists yellowing, so your bright reds and blues stay true.
Matte Varnish
For a soft, painterly finish that feels just like unglazed clay, reach for a true matte sealer made for clay. Mont Marte’s Natural Finish Clay Sealer delivers that chalky, low-sheen look, hiding fingerprints and dust on air-dry décor or hand-built planters. It’s the perfect final touch for those little pinch-pot succulents on your windowsill
Satin Varnish
Can’t decide? Satin sits right in the middle with a gentle glow. It’s the all-rounder finish for mixed projects, slab trays, small wall hangings, or hybrid pieces where you’ve poured both acrylic paint and glaze over your clay.
Tips From The Shed: Always apply varnish in thin, even coats with a clean, soft brush. Let each coat dry completely (about one hour) before adding the next. And work in a dust-free zone, nothing kills a gloss finish faster than stray hairs and fluff.

Clay Inspo: What Can I Make?
Need some clay-spiration to kickstart your creativity? Here are a few beginner-friendly projects that’ll have you squishing, sculpting, and high-fiving yourself in no time, plus the perfect excuse to play with colour, texture and technique.
Mini Clay Trinkets
Sure, a tiny cactus or a desktop gnome might look fancy, but making small trinkets is actually a crash course in clay fundamentals. You’ll be mixing (hello, custom colours), kneading for consistency and experimenting with thickness so your piece holds its shape. Bonus: you end up with a sweet little knick-knack that’s totally “you.”
Leaf Impressions
This couldn’t be simpler: press a real leaf into a slab of air-dry clay, peel it off, let it dry, then paint or varnish. It’s perfect for learning how to roll even slabs, control clay moisture, and capture crisp details, plus you’ll end up with a stunning coaster, wall tile, or gift tag.
Earrings & Organic Shapes
Polymer clay absolutely shines when you’re cutting, shaping, and carving tiny, fluid forms. Make a pair of abstract drop earrings or sculpt a little pendant using Fimo or Mont Marte polymer—you’ll get hands-on practice with conditioning clay, using cutters and blades, and fine-tuning textures.
The Classic Trinket Dish
This is the OG beginner project for a reason. Roll out a slab, drape it over a bowl, trim the edges, smooth the walls—and voilà, you’ve got a perfectly imperfect dish for rings, keys or loose change. Play with wall height, edge treatments (scallops, ripples, straight cut) and surface finishes to make it your own. Remember, it’s all about the process, not perfection. Even the masters started with wonky lumps and big ideas.
Clay FAQs from Beginners (AKA: The Stuff You Panic-Google)
Q: How should I store air-dry clay?
Wrap it tightly in plastic wrap, then pop it in an airtight container. Keep it out of direct sunlight or it’ll start to harden. You can also spritz it with a little water before sealing to maintain softness.
Q: How do I store polymer clay?
Keep unused pieces in a cool spot, wrapped in baking paper or cling film, and stored in a snap-lock container. Avoid plastic that reacts with polymer (like PVC)—glass jars or polymer-safe storage boxes are your best bet.
Q: Why does my clay crack?
Usually from drying too fast or unevenly. Cover your clay with plastic while drying, wedge traditional clay thoroughly, and avoid super thick pieces.
Q: Can I mix brands of polymer clay?
Yes, but stick with the same type (e.g. all Sculpey or all Fimo Soft) if possible for best baking consistency.
Q: Can I waterproof air-dry clay?
Short answer—nope. It’s great for display pieces, but don’t use it for anything that needs to hold water, even if it’s sealed.
Q: Can I reuse dried-out air-dry clay?
Sometimes. Try kneading in a few drops of water and letting it rest in a sealed bag overnight. But if it’s too far gone, compost it or use it as filler for larger sculptural builds.