HIMI Jelly Gouache Review: How It Paints and How to Use It
Author: The Art Shed Team Date Posted:4 November 2026

HIMI Jelly Gouache Review: How It Paints and How to Use It
By Sarsha, Art Shed | 4 November 2026
If you've spent any time on art social media, you've probably come across HIMI jelly gouache: colourful cases filled with little cups of thick, creamy paint. The packaging certainly catches your eye, but I wanted to know what the paint was actually like to use.
Now that HIMI has landed at Art Shed, I had a good excuse to find out. I always prefer to try a product properly before recommending it, so I painted a tiger illustration from start to finish and made a swatch sheet to test opacity, blending, metallic colours and what happens when the paint dries.
We stock HIMI, so I'll be straight with you about what worked, what took some getting used to and what I'd do differently next time. This hands-on HIMI gouache review covers how it paints, how to use it, keeping the cups fresh, how it compares with tube gouache and which set I'd recommend.
In this review: Quick answer | Pros and cons | What it is | What I found | Who it's for | Which set to buy | How to use it | Tiger step by step | Keeping it fresh | FAQs
Quick answer: is HIMI jelly gouache any good?
Yes, for the right painter. HIMI is a student-grade gouache with surprisingly strong colour, even when you add plenty of water. It blends well, handles layers nicely and can cover dark paint with a lighter colour in one coat. It also thins down for watercolour-style washes. The thing to get right is your water ratio: start with a barely damp brush when you want opaque coverage, and add more water when you want a thinner wash.
Want to try it yourself? Shop HIMI jelly gouache at Art Shed, or read on to see which set makes sense for you.
HIMI: Pros and Cons
| What I loved | What to know before you buy |
|---|---|
| Colour stays strong, even with plenty of water | Student-grade paint, rather than a professional or archival range |
| Good coverage, including light colours over dark | Trickier to keep very thick than tube gouache |
| Blends well once you find the right water ratio | Needs a damp brush to move easily from cup to palette |
| A useful range of colours, including ready-mixed neutrals | Some shades dry a little darker |
| Dries flat and matte, like traditional gouache | Metallics lose some impact away from the light |
| Lots of colours without a big price tag | The open cups need a little looking after |
What Is HIMI Jelly Gouache?
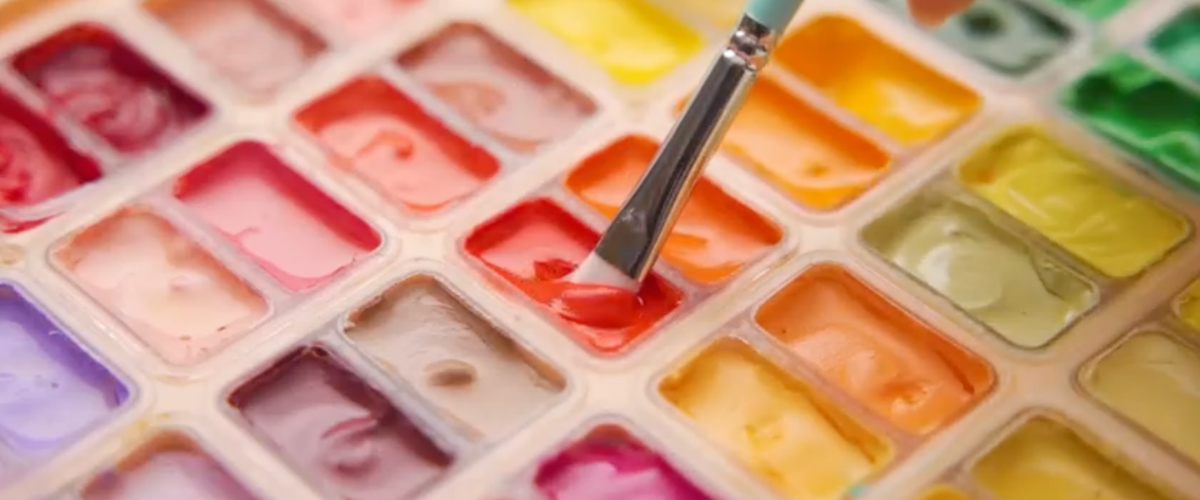
HIMI jelly gouache is water-based gouache sold in individual cups instead of tubes. Open the case and you'll find thick, creamy paint with that almost jelly-like texture HIMI is known for. You can dip your brush straight in for opaque colour, or loosen a little paint with water when you want it to spread further.
Once it's on the paper, it works much like traditional gouache: it dries matte and can be reactivated with water later. The cups make it easy to jump between colours, but because the paint stays moist inside the case, you'll need to take a little more care with storage than you would with sealed tubes.
New to gouache? Our complete guide to gouache paint goes through the basics, techniques and supplies.
About HIMI
HIMI is an art supply brand from MIYA, a Chinese art materials company established in 2011. HIMI launched in 2018 and found its audience with the jelly gouache sets you've probably seen on Instagram or TikTok, with their bright cases and neat rows of paint cups. The price has made them popular with students, beginners and artists who like trying new materials without spending a fortune. The range now goes beyond gouache to acrylics, watercolours and accessories. At Art Shed we've brought in the jelly gouache sets, chameleon and metallic gouache, HIMI jelly acrylics and HIMI Gouache Spray for keeping the cups in good condition.
Does Jelly Gouache Feel Different to Paint With?
Not really, which I wasn't expecting. The paint looks quite different sitting in its cup, but once I loosened it with a little water, it felt much like the gouache I was used to. You're not pushing jelly around the paper. The unusual part is mostly the cup format, not the painting experience.
| HIMI jelly cups | Tube gouache | |
|---|---|---|
| Getting paint out | Dip your brush in; a little water helps move it onto a palette. | Squeeze out the amount you want. |
| Thick, opaque paint | Possible, especially in layers, but harder to keep really thick. | More straightforward, because you decide when to add water. |
| Ready to paint | Open the case and start painting. | Squeeze some out, then mix. |
| Looking after it | Keep the case sealed and the cups clean so they don't dry out. | The sealed tube does most of the protecting. |
What I Found After Testing HIMI Jelly Gouache
I went into this knowing HIMI is student-grade paint. I wasn't asking it to perform like a professional range; I wanted to see what the colour was like, whether it was pleasant to work with and how much I could actually do with it.
I used the HIMI Twin Cup Jelly Gouache Set 48 x 12g on the Art Spectrum 25% Recycled Sustainable Cotton Watercolour Pad, A4 300gsm. It's cold-pressed paper, so keep in mind that lifting and layering can feel different on a smoother or more absorbent surface. I tested swatches first, then painted the tiger from sketch to final outline.
How Pigmented Is HIMI Jelly Gouache?
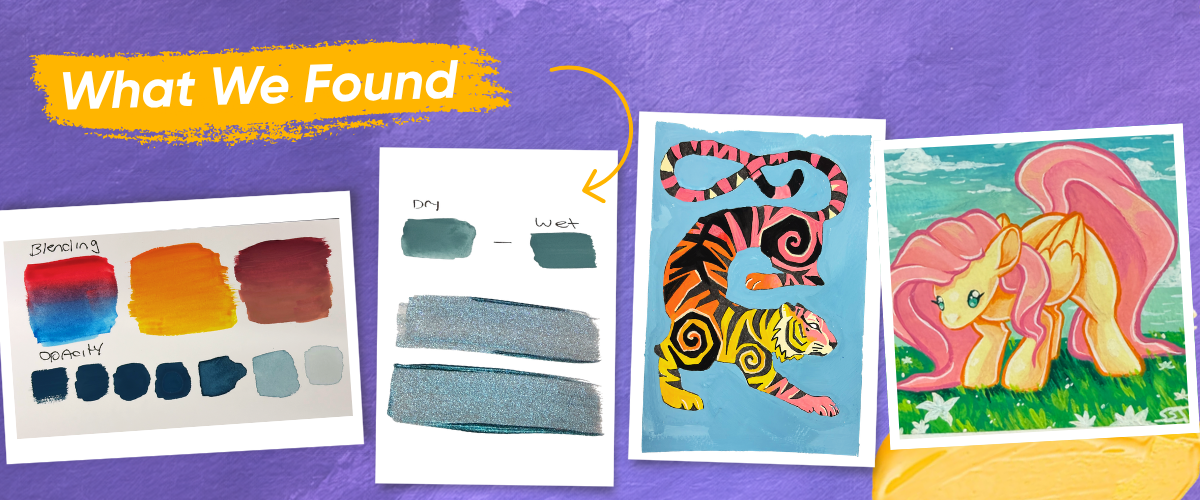
Very pigmented, even with plenty of water. This was one of the first things that caught me off guard, especially when I kept diluting the paint just to see how far the colour would go.
I took a tiny bit of blue that was already watered down, added even more water and expected it to be almost invisible. Instead, I still had a clear baby blue on the paper. I was using hardly any paint at that point, so that result was a pleasant surprise.
That gives you quite a bit to play with. Use HIMI thick and you can get solid, opaque colour; thin it down and it starts behaving more like watercolour. If you normally paint with watercolour, you'll probably appreciate being able to begin with transparent layers and then come back with thicker gouache for light details and changes you couldn't easily make with transparent paint.
I could put thin layers over thin ones, and thicker paint worked over both thin and thick areas. Thin paint over a thick, dry layer was the awkward combination: the extra water reactivated the colour underneath and started mixing it into the new wash. I actually had the most success treating it a bit like oil painting and following the fat over lean principle, gradually building from thin, watery layers to thicker, creamier ones. It's not quite the same rule as with oils, but it's a handy way to think about layering gouache. That's especially worth remembering if you want to glaze, as I found thin-over-thin layers much easier to control than watery washes over thick paint.
My tip: For paintings that use both washes and opaque details, work from thin to thick. Put down your watered-down colours first, then build towards creamier paint. I'd also make a quick dilution chart with one colour, going from straight out of the cup to progressively more water. You'll soon see how much colour you're getting for very little paint.
Layering: How Well Does HIMI Jelly Gouache Cover?
Well. In fact, this was probably my favourite part of using HIMI. I could add depth and detail a layer at a time, rather than having to make every shape and colour perfect from the start.
The best example is the pink on my tiger. I'd originally painted that area a deep purple, then decided I wanted a much lighter pink instead. The purple had been dry for at least a day, and one coat of creamy, slightly diluted pink covered it. I thought I'd need to go back in for a second coat, but I didn't.
The catch was how much I fiddled with it. If I kept brushing over the pink, I started pulling purple up from underneath. If I laid the colour down and left it alone, the finish was even and barely streaky. That's a big reason I like gouache for illustration: you can change a dark area to a light one without starting the whole section again.
My tip: Let the dark layer dry properly, keep the next colour creamy rather than watery and put it down in a few confident strokes. The more you scrub at it, the more likely you are to lift what's underneath.
Opacity and Consistency: How Thick Is HIMI Jelly Gouache?
It's thick, creamy and a little heavier than the milky texture I usually like to paint with. You can work straight from the cup if you're after opaque colour, but I found it didn't travel very far across the paper that way. I used more paint to cover an area than I would with some other gouaches I've tried.
I got on best by rinsing my brush, taking off most of the water and gently mixing the top of the cup before moving paint onto my palette. That gave me the milkier consistency I prefer without thinning the colour too much. A dripping-wet brush was where I ran into trouble, because I'd then need to add more paint to get back to the opacity I wanted. Most shades behaved similarly, although some darker and warmer colours had a bit more punch.
This is one area where tubes have the advantage. You can squeeze out thick paint and decide exactly how much water to add. With HIMI, a little water usually comes along for the ride when you transfer paint from cup to palette, so keeping it very thick takes more attention.
My tip: Start with a barely damp brush. It's much easier to add a little more water than to fix a mix you've watered down too far. Creamy paint worked best for most of my illustration, with thicker paint saved for small highlights and areas needing extra coverage.
Blending: Does HIMI Jelly Gouache Blend Smoothly?
Yes, although I wouldn't say the paint does all the work for you. I tried blue into red, yellow into orange and red into brown on my swatch sheet to see how it handled both similar colours and ones with more contrast and muddiness.
My best results came when the paint was slightly watered down but still creamy. Too thick and it resisted blending; too wet and I started lifting the layer underneath. Smaller sections were easier than trying to blend a large area at once. On the tiger, the orange-to-yellow section worked particularly well because I blended while both colours were still wet. I could soften an edge later with a damp brush, but it wasn't quite the same as blending fresh paint. The colours stayed fairly clean, too, as long as I stopped before I'd mixed them into one muddy patch.
Our artist Kat tried the blending as well with her pony illustration, and hers came out smoother than mine! That told me quite a lot. The paint can blend well, but your brushwork, timing and water ratio make a real difference to the result.
My tip: Work in smaller sections and blend while both colours are wet. Keep the paint creamy and use a clean brush where the colours meet. If an edge has dried, try a barely damp brush to soften it, but don't flood the area or you'll lift the layer below.
Finish: Does HIMI Jelly Gouache Dry Darker?
Slightly, yes. Most shades looked a bit darker once dry, with the pinks showing the clearest change. Part of what you're seeing is the wet sheen disappearing: as the surface turns matte, the same colour can look different under the light.
HIMI dried with the flat, matte finish you'd expect from gouache. I liked that larger areas stayed fairly even, without obvious brushstrokes cutting through the colour. The surface also had a slightly chalky, velvety feel, almost like a smooth chalkboard. I've used gouaches that feel more like the paper once dry, and others that feel a bit plasticky; HIMI sat somewhere different again.
My tip: If you're mixing a particular shade, test it on scrap paper and let it dry before painting a large section. A dried colour chart will tell you more than looking at wet paint in the cups.
Re-wetting: Can You Reactivate Dried HIMI Gouache?
Yes. Like other traditional gouaches, HIMI can be reactivated with water once it's dry. I tried it on my plastic palette and on the watercolour paper. Both worked, but the palette was noticeably easier because the paint was sitting on the surface rather than settling into paper fibres. Thin leftover smears came back quite watery; larger dried blobs gave me a thicker mix. Either way, the colour barely changed.
There are two different situations here. Re-wetting leftovers on your palette is handy and saves paint. Re-wetting a finished part of your artwork lets you soften an edge or make a change, but you can also lift a layer you meant to keep. I've done both, so it's worth knowing the difference.
My cups didn't dry out during testing, so I'm talking about paint that dried on the palette or paper, not paint that had hardened inside the set.
My tip: Before you wash your palette, add a few drops of clean water to the leftover gouache and see what you can bring back. It may be thinner than when you first used it, so adjust the mix depending on whether you're after a wash or solid coverage.
HIMI Metallic and Chameleon Gouache: How Do They Perform?
I also tested the HIMI Chameleon & Metallic Set, which contains eight colour-shifting chameleon shades and four metallic colours.
The metallics looked great when the light hit them: lots of shimmer and a strong reflective finish. Move the paper away from direct light, though, and a few shades became quite grey or muted. The effect seems to depend heavily on the reflective particles, not just the base colour. Chameleon colours are designed to shift tone with the viewing angle, while regular metallics mainly give you that reflective shine.
I'd use these for smaller details rather than a whole painting: jewellery, lettering, beetle wings, reflections on water or anything you want to catch the light when you move the page.
My tip: Swatch them on dark and white paper before using them in a piece. Dark paper can show off the shift more clearly, and a colour that looks impressive under a lamp might look quite different on your desk in daylight.
What Is the HIMI Jelly Gouache Colour Range Like?
I had a lot of fun with HIMI's colour selection. There are bright pinks, blues and greens, but also warmer shades, cooler shades and useful ready-mixed colours. Beige might not be the first cup you reach for, but it's handy for skin tones, natural subjects and colours you want to tone down a little.
You could mix those shades yourself, of course. Having them ready to go just means less time trying to remix the exact same colour, which is helpful when you're learning or working on an illustration with several sections. I also found it easy to put together both high-contrast palettes and more muted combinations.
HIMI has 18, 36 and 48-colour jelly gouache sets. A smaller set gives you room to practise mixing; a larger one gives you more colours you can reach for without mixing from scratch. Neither approach is better for everyone.
My tip: Even if you own the 48-colour set, try picking just four or five colours for one painting. It makes you think about which colours work together, and you may find you don't need all 48 to get the result you're after.
Who HIMI Is For (and Who It Isn't)
| HIMI is a great fit if you… | You might prefer tube gouache if you… |
|---|---|
| Are new to gouache or coming from watercolour | Want thick, opaque colour straight away |
| Like building paint from washes to details | Need precise control over consistency |
| Paint illustrations, sketchbooks or journals | Are making professional or archival work |
| Want plenty of colours for the price | Would rather not maintain open cups |
| Want to practise without worrying about every drop |
Think HIMI might suit the way you paint? Browse the HIMI range at Art Shed, or keep going for a closer look at the sets.
HIMI vs Mont Marte, Art Spectrum and Holbein Gouache
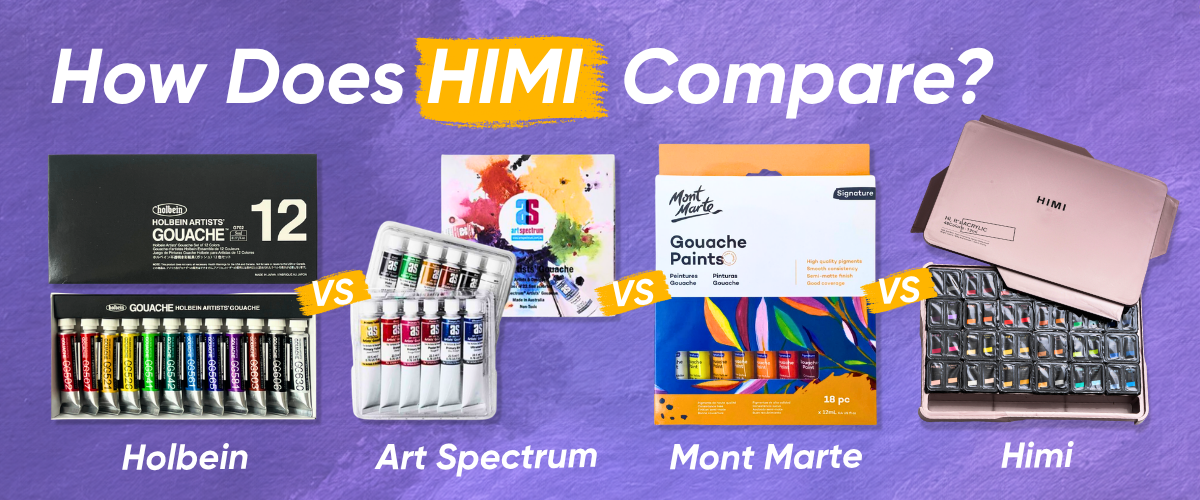
There isn't one gouache I'd recommend to everyone. I've tested HIMI here, so this comparison is based on each range's format and grade, rather than a side-by-side paint test.
| Set | Format | Grade | Re-wets with water | Best for |
|---|---|---|---|---|
| HIMI Jelly Cup Gouache Paint Set 18 x 30g | Jelly cups | Student | Yes | Beginners, layered illustrations, plenty of colour for the price |
| Mont Marte Signature Gouache 18pc | Tubes | Student | Yes | Beginners who prefer tubes |
| Art Spectrum Gouache Set 6 | Tubes | Professional; made in Australia | Yes | Experienced painters mixing their own colours |
| Holbein Designer Gouache Set 12 | Tubes | Professional | Yes | Detail-focused illustrators trying professional gouache |
I'd choose HIMI for learning, sketchbooks and illustrations where you want to work from loose washes to more solid layers. I'd look at tube gouache if you need thick paint straight away, want tighter control over consistency or are making work that needs documented archival properties. Mont Marte is the accessible tube option; Art Spectrum and Holbein are professional ranges. Our gouache guide looks at the brands in more detail.
HIMI isn't trying to replace professional gouache. For practising, playing with colour and getting comfortable with the medium, though, I think it earns its place.
Which HIMI Set Should You Buy?
The main differences between HIMI sets are how many colours you get, how much paint sits in each cup and whether you're buying gouache or acrylic. Here's the quick version, followed by how I'd choose between them.
| If you… | Start with | What's in it |
|---|---|---|
| Are trying gouache for the first time | HIMI Jelly Cup Gouache Paint Set 18 x 30g | 18 colours in 30g cups |
| Want more choice without the biggest set | HIMI Twin Cup Jelly Gouache Set 36 x 12g | 36 colours in 18 twin cups |
| Want a large palette, or already own the 18 | HIMI Twin Cup Jelly Gouache Set 48 x 12g (my tiger set) | 48 colours in 24 twin cups |
| Want shimmer for highlights | HIMI Chameleon & Metallic Gouache Set 12 | 8 chameleon and 4 metallic colours in 12ml cups |
| Want permanent colour on more surfaces | HIMI Jelly Acrylic Set 36 or 48 | 36 or 48 acrylic colours |
| Already own a HIMI set | HIMI Gouache Spray | Helps keep paint soft and workable |
HIMI Jelly Cup Gouache Paint Set 18 x 30g
Best for: First-time gouache painters and anyone who uses plenty of the same colours.
This is the original set that made HIMI's little paint cups so recognisable. You get 18 colours in large 30g cups and a clip-close case in green, pink or yellow. It's enough colour to start mixing and painting without staring at 48 options every time you open the lid. And if you go through a lot of one shade, those larger cups can be more useful than having a bigger range of smaller ones.
Shop the HIMI Jelly Cup Gouache Paint Set 18 x 30g
HIMI Twin Cup Jelly Gouache Set 36 x 12g
Best for: Sketchbook painters, illustration students and anyone wanting more colours without buying the largest set.
I'd call this the middle option. The 36 colours sit in 18 twin cups, with each cup divided into two compartments, all in a purple case. You get more pastels, brights, earth tones and darks than in the 18-colour set, without going all the way to 48. It's a good fit for small illustrations and character work, and you'll still find plenty of reasons to mix your own shades.
Shop the HIMI Twin Cup Jelly Gouache Set 36 x 12g
HIMI Twin Cup Jelly Gouache Set 48 x 12g
Best for: Illustrators and anyone who likes having a wide choice of colours ready to use.
This is the one I used for the tiger, and I appreciated having so many colours within reach. There are 48 shades in 24 twin cups, from bright primaries to deeper colours, pastels and muted tones. Twelve aren't in the 36-colour set, including Powder Blue, Lilac and Light Tan. I kept jumping between warm and cool colours while painting, so having those shades ready-made saved me a bit of back-and-forth at the palette.
Shop the HIMI Twin Cup Jelly Gouache Set 48 x 12g
HIMI Chameleon & Metallic Gouache Set 12
Best for: Details, lettering, decorative accents and anyone curious about special-effect paints.
Already have a gouache set and want to try something different? This one has eight chameleon colours and four metallics in 12ml cups. As I found in the swatches, the light makes a big difference to how they look. I'd use them for details that catch the light, rather than trying to build an entire painting around the effect.
Shop the HIMI Chameleon & Metallic Gouache Set 12
Prefer Acrylic? Try HIMI Jelly Acrylic Paint
Best for: Acrylic painters, craft projects and anyone who wants their layers to stay put after drying.
HIMI Jelly Acrylic has the same handy cup format, but it's a different paint once dry. Gouache can be re-wet; acrylic forms a permanent, water-resistant film. That makes acrylic more practical if you want to paint over a dry layer without lifting it. The paint dries matte and works on suitable surfaces including canvas, wood and card. Art Shed has a 36-colour set in a green metallic case and a 48-colour set in a pink metallic case.
I'd stick with gouache if you like being able to soften or rework dried paint. If you're after permanent layers or working across different craft surfaces, the acrylic sets make more sense.
Shopping for a painter this Christmas? HIMI could be a fun gift for a beginner, teenager or someone keen to try gouache.
Our gift guide for painters has a few more ideas.
How to Use HIMI Jelly Gouache: 9 Tips for Getting Started
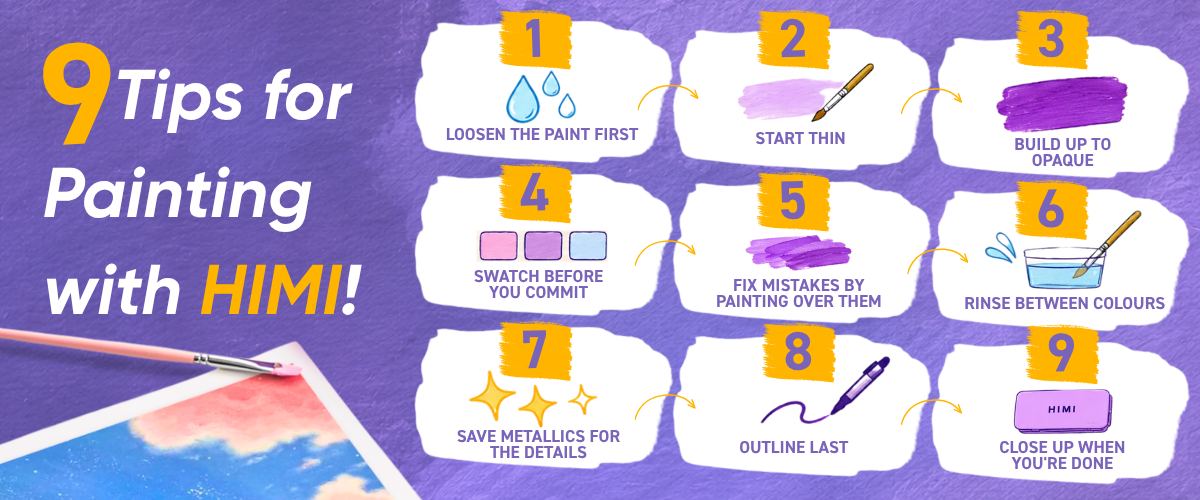
HIMI is fairly easy to get started with, but I found that getting the water ratio right made the biggest difference. These are the steps I'd follow if I opened a fresh set again.
1. Give the paint a quick stir. You might find a little separated binder sitting on top when you first open a cup. That's normal; use a clean toothpick or palette knife to mix it back in. Then take some paint with a slightly damp brush and loosen it on your palette, adding water a little at a time.
2. Start with thin washes. Use watered-down colour to map out your first shapes and areas. The blue in my tests held its colour even when quite diluted, so you don't need much paint for this stage.
3. Build up to opaque layers. Reduce the water as you go for stronger coverage. Let each layer dry, and be gentle if you're brushing over a thick area: too much water can wake up the paint underneath.
4. Swatch your colours before committing. The pinks in particular looked a little darker once dry. For a large area or a colour you need to match, test it on scrap paper and wait until it's dry.
5. Don't be afraid to paint over mistakes. I changed a deep-purple area of my tiger to pink with one coat. Let the first colour dry, keep the new paint creamy and don't keep brushing over the same spot.
6. Keep your paint cups clean. Rinse your brush between colours and take off excess water before dipping into the next cup. Mix on a separate palette so you're not accidentally turning every cup into a new shade.
7. Use metallics and chameleon colours where they'll be seen. They're at their best when the light hits them, so try them for lettering, highlights and small decorative details. Test the effect in different lighting first.
8. Add your outlines last. Let the paint dry completely before using a fineliner, and test on a painted scrap. Some nibs catch on thick paint, and some inks can smudge.
9. Keep those jelly cups fresh. Seal the case properly after painting and check the cups now and then. I've covered the care side in more detail below.
How I Painted My Tiger with HIMI Jelly Gouache: Step by Step
For the actual painting test, I went with a tiger made up of bright colours, strong shapes and quite a few little markings. I wanted to see how HIMI handled everything in one piece: watery base colours, blending, heavier coverage and pen outlines. I worked from a loose first wash through to thicker paint and finished with the details.
What You'll Need
- HIMI Twin Cup Jelly Gouache Set 48 x 12g
- Art Spectrum 25% Recycled Sustainable Cotton Watercolour Pad, A4 300gsm
- Mont Marte gouache brushes, or similar painting brushes
- Mont Marte fineliners
- HIMI Gouache Spray (optional, for keeping the cups moist)
- Pencil, palette, clean water and paper towel
Step 1: Sketch Your Design
I lightly sketched the tiger's shape, stripes and spiral markings in pencil. I wasn't trying to make a perfect drawing at this stage. I just wanted the shapes in place so I knew where each colour would go once I picked up the paint.
My tip: Go easy on the pencil in areas that will stay pale. Thick gouache can cover pencil, but graphite may still show through if you keep your paint watery.
Step 2: Start with a Light Ombré Wash
I didn't start by covering everything in thick paint. Instead, I watered the gouache down and brushed in a transparent base to work out the colour placement. While the colours were wet, I let them run into each other slightly to get the ombré effect I wanted.
Use a little paint and more water than you would for an opaque layer. Work while the neighbouring colours are still wet, and use a clean damp brush if you need to soften where they meet. At this point it's fine if the colours look pale; you're going back over them.
Step 3: Build Up Your Opaque Colours
When the wash was dry, I came back with creamier paint and less water. That made the colours stronger and let me tidy the tiger's shapes, add contrast and cover areas more evenly. I found it much easier to build the colour in stages than try to get full coverage from the first stroke.
My tip: Let the thin layers dry before going in with thicker paint. You'll have an easier time keeping the first colours where you put them.
Step 4: Don't Be Afraid to Change Your Mind
I originally painted one part of the tiger deep purple, then decided it really needed to be pink. Luckily, the purple had been dry for at least a day. I put one coat of slightly diluted, creamy pink over it and that was enough. I did have to stop myself fiddling with it, because too many strokes started lifting the purple. Still, it was a useful reminder that a wrong colour choice isn't the end of the painting.
Step 5: Add Details, Depth and Highlights
Once the main colours were in place, I worked on the stripes and smaller markings, then added beige highlights. Beige gave me a lighter contrast without the sharpness of white. I switched between slightly thinner paint for transitions and thicker paint where I wanted a small mark to stand out.
My tip: For light details over dark paint, use a small brush, very little water and a layer that's properly dry underneath. A couple of careful strokes are better than going back over the same mark repeatedly.
Step 6: Finish with Fineliner Details
After everything had dried, I outlined the tiger with my Mont Marte fineliners. I like using fineliners with gouache because the colour stays flat and the pen can do the sharp edges and small markings. It suited the slightly graphic look I was going for.
Wait until the gouache is completely dry before adding pen. Thick paint can take longer than a wash, and a damp patch can catch your nib or make ink bleed. It's worth trying your fineliner on a painted scrap first, particularly if the ink is water-based.
And that was the finished tiger: a watery first layer, more opaque colour over the top, one fairly major colour change and pen details to finish.
Does HIMI Jelly Gouache Go Mouldy? How to Keep It Fresh
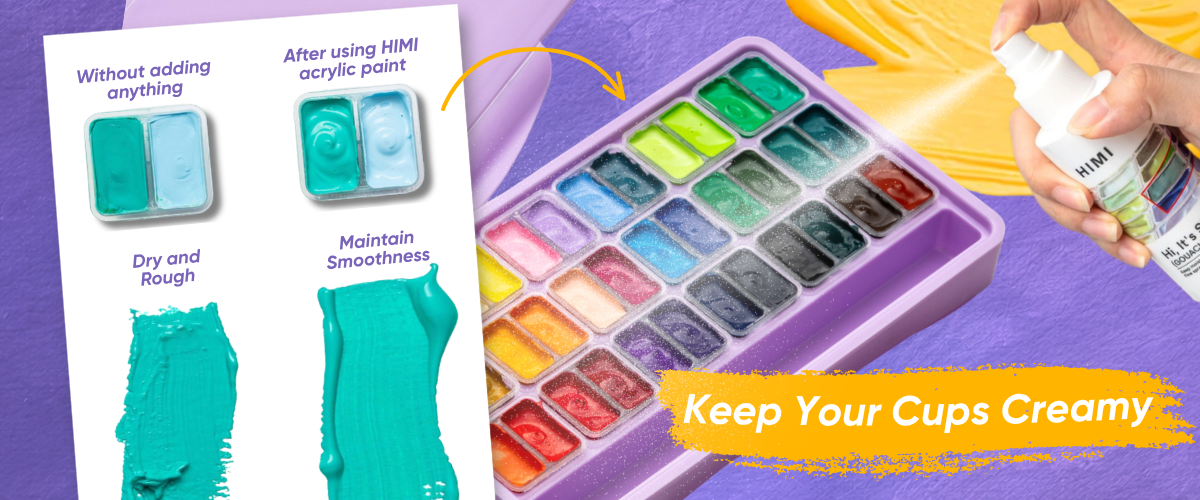
It can, and it's worth knowing about. Some HIMI owners have reported mould in their cups after longer stretches in storage. I haven't had mould or drying issues with my own set, but I do think it's worth getting into a few good habits from the start.
Keep the case properly sealed. After you've removed the protective seals, the outer case does most of the work. Clip it shut after painting and don't leave the cups sitting open for hours.
Give your paints a light mist. HIMI Gouache Spray is intended to help maintain moisture and limit bacterial and mould growth. The draft guidance is to hold it about 20cm away and use two or three light sprays when needed, not soak the cups.
Keep your tools clean. Rinse brushes between colours, change murky water and try not to take dirty brushes straight into the cups. I like mixing on a separate palette, which also stops one colour contaminating the next.
Store your set somewhere cool and dry. Keep it out of hot cars, direct sun and humid spots. Heat dries the paint out, while warm, damp storage can give mould a better chance to develop.
Check your cups between sessions. If the set's been sitting for a while, open it and have a look before painting. A dry surface may soften with a little moisture; visible mould is different, and the affected paint is safest discarded.
Avoid household preservatives. You might see tips online about adding alcohol, essential oils or antibacterial cleaners. I'd stick with products the paint manufacturer recommends, rather than experimenting with household additives inside the cups.
My tip: Don't assume more water means fresher paint. If there's water pooling in the cups, you've gone too far. A light mist when needed, clean brushes and a properly closed case are a better routine.
The HIMI Gouache Spray is worth considering if you already own a set.
HIMI Gouache FAQs
Is HIMI gouache good for beginners?
Yes. It's an affordable way to try gouache, the colour range gives you room to experiment and you don't need to know much about mixing to get started. I especially liked it for paintings built up in layers.
Is HIMI gouache re-wettable?
Yes. Dried HIMI gouache can be reactivated with water. I found it easier to do on a plastic palette than on paper, where it sometimes took more water and brushing.
Can you paint light colours over dark with HIMI?
Yes. I covered a deep-purple area on my tiger with one coat of light pink. Let the dark colour dry first, use creamy paint and avoid brushing over it too many times.
Is HIMI gouache professional quality?
No. HIMI is a student-grade gouache. I liked it for practice and illustration, but if you need published archival properties or very consistent opacity, I'd look at a professional range.
Is HIMI gouache lightfast?
For sketchbooks and practice, I'd happily use it. For work you want to display for years, I'd choose a professional gouache with published lightfastness ratings.
Does HIMI gouache dry darker?
Some do. The pinks in my tests dried a little darker than they looked wet. If you need to match a colour closely, let a swatch dry before mixing a whole batch.
Does HIMI jelly gouache go mouldy?
Some owners have reported mould after their sets have been stored for a while. Keeping the case closed, brushes clean and moisture under control may reduce the risk, but discard paint if you can see mould.
Is HIMI gouache safe for kids?
HIMI gouache is labelled non-toxic. Younger children should still paint with adult supervision and not suitable for children under 3.
Is HIMI jelly gouache a good gift?
Yes. It's colourful, ready to use from the cup and doesn't call for a big collection of extra supplies. I'd consider it for a budding illustrator, a creative teenager or someone who keeps talking about trying gouache. Our gift guide for painters has more ideas.
What paper should I use with HIMI gouache?
I used Art Spectrum's sustainable 300gsm cotton watercolour paper and it handled the washes and repeated layers well. Heavier watercolour paper is a sensible place to start. Our gouache guide goes through other surfaces.
Can you seal a HIMI gouache painting?
Yes, but be careful: gouache stays water-soluble, and some sealers can disturb the paint or change its finish. Our gouache guide covers ways to protect a finished painting.
What's the difference between HIMI gouache and HIMI acrylic?
HIMI gouache can be re-wet after drying, so you can go back and change an area. HIMI jelly acrylic dries into a permanent, water-resistant layer. Both come in the cup format.
Where can I buy HIMI jelly gouache in Australia?
You can buy the HIMI range online at Art Shed, a family-owned Australian art supplies retailer with a Moorabbin store. We stock jelly gouache, metallic and chameleon colours, jelly acrylics and HIMI Gouache Spray.
Shop HIMI at Art Shed
So, after testing HIMI jelly gouache properly, would I recommend it? Yes, especially to beginners, illustrators and anyone who likes working with colour without feeling too precious about the paint.
For student-grade gouache, it did more than I expected. The blue stayed strong even with lots of water, the pink covered that dark purple in one coat and the 48-colour palette made it easy to change direction halfway through painting. I did have to get used to controlling the water and looking after the cups, but those weren't deal-breakers for me. I had a good time using it, and I'd happily reach for it again for this kind of illustration.
If you're thinking of giving gouache a go, or you want a set for sketchbooks and illustrations, you can shop the HIMI range at Art Shed, including jelly gouache, chameleon and metallic colours, jelly acrylics and the HIMI Gouache Spray.