


How to Create Fluid Art and Make Your Own Pouring Medium
Date Posted:15 January 2018
How to Create Fluid Art - and Make Your Own Pouring Medium
Fluid Art and Acrylic Paint Pouring is an interesting way of applying acrylic paint to canvas, it creates free-flowing nebulas of paint and colour - and can be really effective when done well.
We understand that not all Artists can afford to use the top quality archival mediums, such as Liquitex Pouring Medium or Atelier Pouring Medium to make their fluid art with - and many people seek alternative ways to create the same effect so they can experiment with fluid art, and hone their skills without it costing a fortune.
We are going to show you a recipe using Mont Marte Art Supply products to make your own pouring medium, and also examine a few basic tips for getting into fluid art painting.
How to Make Your Own Pouring Medium
Using 4 ingredients you can mix your own version of Pouring Medium to practice your pour with for a quarter of the price.
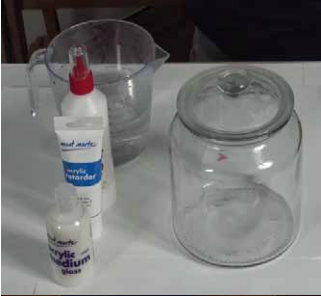
The ingredient you will need are listed below, and can be found on our website and will cost under $25
The mix is a combination of -
1 Part Mont Marte Acrylic Medium Gloss
3 Parts Mont Marte PVA Glue
1.5 Parts Water
And half a tube of Acrylic Retarder
In this example, 405mls of PVA, 135mls of Acrylic Gloss Medium, and 203mls of Coldwater has been used.
Once thoroughly mixed the liquid should be the consistency of pouring cream.
If you want to make a larger batch all you need to do is increase the quantities at the same ratios.
The mixture can be stored in an airtight container, make sure to remix is if you leave it overnight in the container in case elements have separated.
Mixing Paint and Pouring Medium
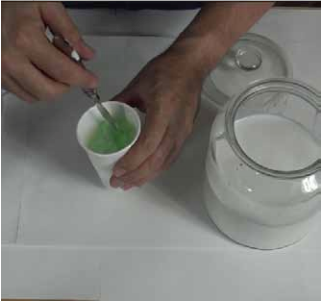
Prior to commencing a pour your will need to mix up your colours with the medium in cups or containers.
Using plastic cups, combine 1 part Paint, 2 Parts Pouring Medium and 1 part Water. Using a wooden stirrer to thoroughly combine all the elements until it is the consistency of pouring cream.
Creating your first pour
In this demonstrated pour, colours are mixed to suggest a galaxy or clouds. To create this style of pour, fill the plastic cups with small amounts of the paint previously mixed with pouring medium.
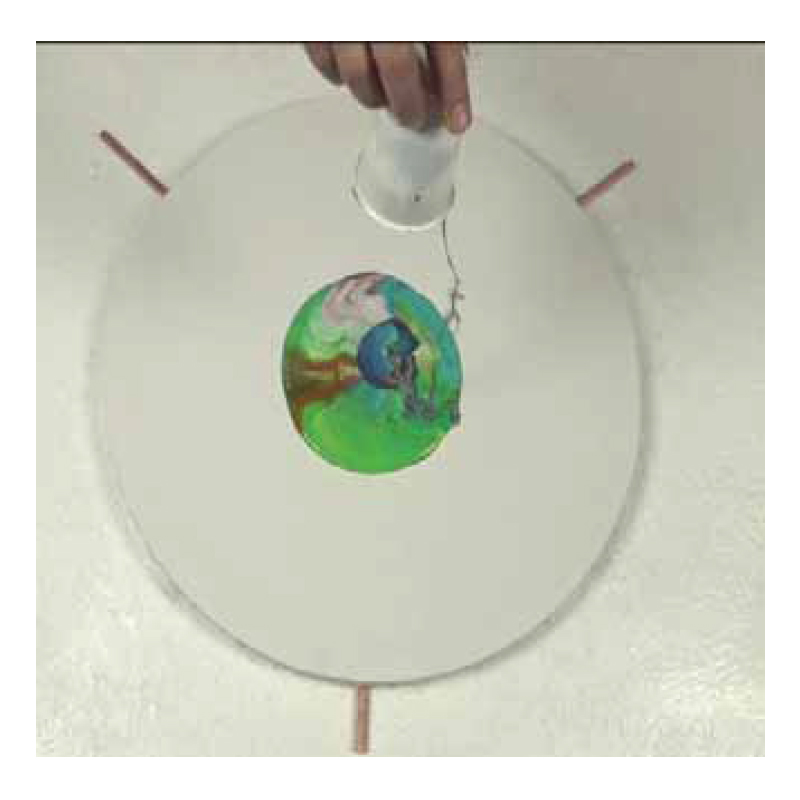
The order for colours is not that important but some nice results are achieved if you pour the colours into the cup in colour groups: for example warm colours and then cool colours
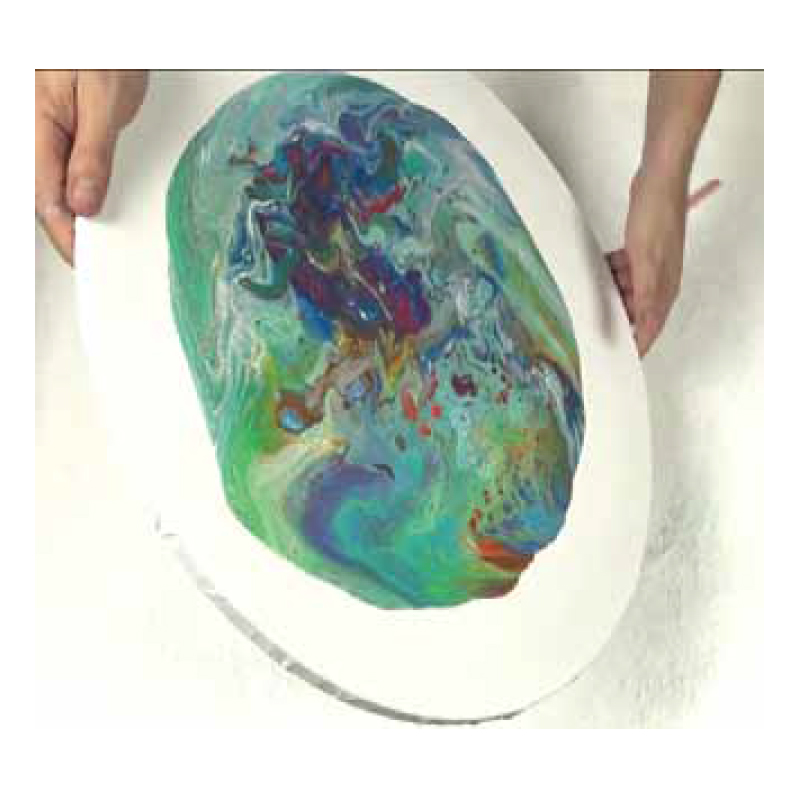
Once the pouring cup is filled. Hold the cup in your hand and lay the canvas face side down on top of the cup. Ensure the cup is relatively centralised. Hold the cup and the canvas tightly together and flip the canvas face side up. You can then gently lift the cup and release the paint. Manipulate the paint around by tilting the canvas until it is covered.
Watch Mont Marte Joe's video demonstration covering most of what is mentioned in this post.
Looking for round canvas? Click here to see our range of round, oval and heart-shaped art canvases
These are just some of the basics of fluid art, but we welcome you to add your own tips and comments below :)
Different Fluid Art Pouring Techniques
Fluid art is technique that has taken off all over the world and is producing some amazing, creative art pieces from both beginner and professional artists. The technique is also sometimes called flow art, and this refers to the consistency of the acrylic paints used in the process. The paint is designed or manipulated to spread and flow easily across mediums, while maintaining its original colour. Fluid acrylic paints are the best for this kind of art, as opposed to those involving a paint brush.
There are a number of paint manufacturers and brands that sell ready-made fluid art acrylics, but we know that these may not be in everyone’s budget - especially if you are just starting to experiment with it. Luckily you can make you own version too, which is just as effective and much lighter on the wallet.
The best techniques for pouring for beginners
The wonderful thing about flow art is that there is no right or wrong way to do it and the end result is completely your own creation. It’s a medium with a lot of variety and there are a number of different techniques to try when pouring to get an interesting array of results.
These are just some of our favourite ways to pour:
The flip cup
During the flip cup technique, individual colours are prepared and then poured into one master cup and then flipped onto the canvas without being stirred first.
Instructions:
- Grab your colours and prepare them into their single cups
- Pour colours into a single cup (as much of each colour as you’d like) with a pouring medium
- Use a few drops of silicone oil
- Put your canvas on top of the cup (desired side down) then turn the cup onto the canvas without breaking contact
- Leave the cup down for a minute or so, then lift the cup up
- Tilt the canvas to get your paint to flow in the direction you want it to go
Tip: Try the dirty pour technique for different results. This is when you use a wooden stick to carefully mix/move your colours around in the main cup to get a more controlled idea of what you paint is going to look like once poured.
The puddle pour
This is a favourite pour technique for beginners and that’s because it’s easy to do and the results can be simply controlled. All colours are poured individually onto a canvas with the first colour forming the base.
Instructions:
- Mix your colours well in separate cups with a wooden stick
- If necessary, add a little silicone oil
- Pour your first colour/base onto the canvas
- Pour the other colours on top of the base in the quantities that you desire
- Tilt the canvas to get the paint going to in direction you want it to
These are just some of the easier techniques to use when doing fluid art and once you get the hang of it and want to start moving onto something more complex, then you can start learning about swipe, swirl and string techniques among many others.
Flow art is a technique that is suited to all ages and levels of experience and is an incredibly fun and rewarding hobby to get friends, family and kids involved in. If you’d like to get your hands on some fluid art supplies or need some expert advice, tip and tricks, then simply pop into the Art Shed store in Melbourne or get in touch with us online and we’ll be more than happy to help you with some ideas and inspiration. We look forward to getting creative with you!
Comments (28)
AK
By: AK on 30 January 2021Hello! I am just starting out with acrylic painting. If I use silicone to create cells, do I need a torch? Which one would you recommend? Thanks AK
Art Shed Online Response
Hi AK, Thanks for your question! A heat torch is not essential for acrylic pouring, we mix 5-10ml of silicone oil with 200ml of acrylic pouring paint to create cell effects, however, you can choose to use a heat/ blow torch to create some interesting effects. Once your paint has been poured, carefully hold the blowtorch horizontally to the surface and make sure the flame isn’t any closer than about an inch and a half. Move it quickly from side to side so that the heat causes the surface colours to contract and create tiny cell patterns. Feel free to email us at customerservice@artshedonline.com.au if you have any further questions! :)
white base dissapears on a dutch pour
By: Helen Foster on 14 November 2020I have done a few dutch pours with the blow dryer and blow torch,great results BUT the white base just dissapears when the painting dries no matter how thick I make it. How do I fix this???
Art Shed Online Response
Hi there, Thanks for reaching out! This may be caused due to using too much paint, we would advise experimenting with less. You are more than welcome to send us some photos to our email if you like so we take a look and advise if this is the case.
Dutch pour
By: Steph on 27 August 2020Would I have to thin my paint mixes with more water for a Dutch pour? To get the correct consistency, I have had to put more than 50% water to thin some of the acrylics out.
Canvas curled up
By: Julie on 10 May 2020I purchased some cheap pre-primed canvas board on Amazon to use for the paint pour, and it warped into a curved “boat” shape, which I cannot flatten. What are your recommendations on the best surfaces to use (I want the finished item to be flat, but thin enough to sit in my scanner). Of course, I don’t want to spend much, but I also like the feel of a sturdier board for picking up and and moving the paint around during the pour.
Art Shed Online Response
Hi! Thanks for your question. Canvas panels would be a great option, as they are sturdy and flat enough that they would be able to be scanned. You can shop them here: https://www.artshedonline.com.au/?rf=kw&kw=Mont+Marte+Canvas+Panel Happy creating!
Pin holes
By: Heather Bladier on 5 May 2020Hi....I am a beginner, but love fluid art. I am usually pleased with the end result the way the colours have flowed, but end up with lots of pin holes. What am I doing wrong?
Art Shed Online Response
Hi! Thanks for your question. This can sometimes occur when mixing the pouring medium with the paint. My best suggestion would be to try and mix the paints slowly to try and avoid bubbles forming. Happy creating!