


How to make a marbled Jewellery Tray / Trinket Dish using Polymer Clay
Author: Dana McGorlick-Appelman Date Posted:18 January 2022
If you like us love the look of marble, but don't love the price tag and want a fun DIY to spruce up your home, look no further! This DIY Jewellery dish is perfect for displaying your favourite rings, necklaces, bracelets and more, and looks beautiful on a dresser or coffee table. This DIY project is also made even more fun in the presence of good company, so grab your best buddies and a Polymer Clay Kit to get creating!
You will need:
- Baking paper and baking tray
- Oven
- Polymer Clay in atleast 3 colours (we used the 100g of the 400g block of titanium white polymer clay by Mont Marte, 60g of the Fluro pink polymer clay by Mont Marte, and 60g of the peach polymer clay by Mont Marte) however, you can opt for your own colours. Exactly how much polymer clay you need will depend on the size of your tray.
- Clay tools
- Drop sheet to protect your workspace
How to create a Marbled Polymer Clay Dish
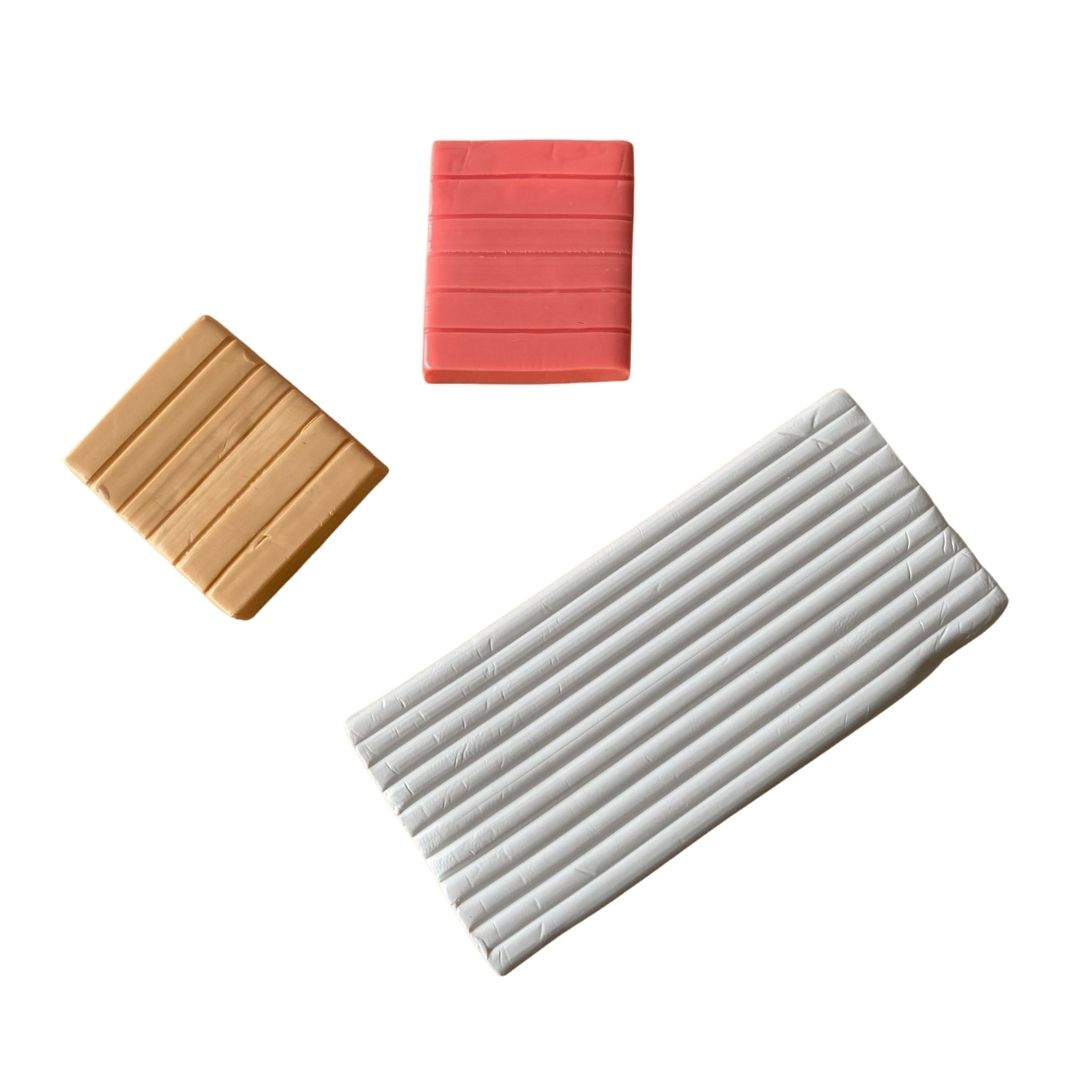
Step 1: Condition your clay
By squishing and rolling pieces of clay with your hands, you are conditioning and softening the clay to make it easier to cut, mould and create with.
.jpg)
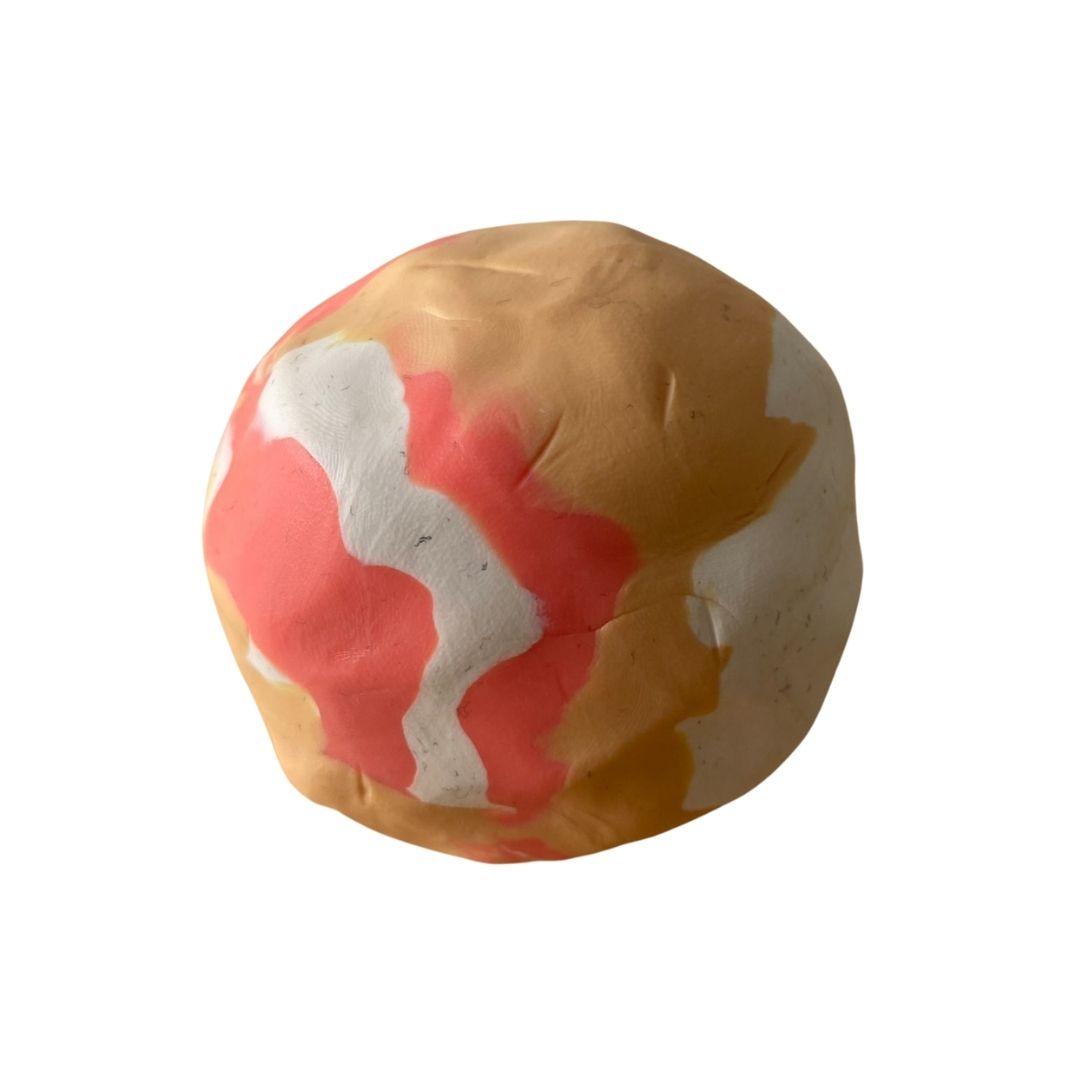
Once all colours you plan to use are nicely conditioned, you can start the marbling process.
To create the marble effect, you will need to decide what colour you want most prominent. The colour you choose will be the larger ‘base’ colour and you will need to have more of this clay than the others.
.jpg)
Step 2: Combine your colours
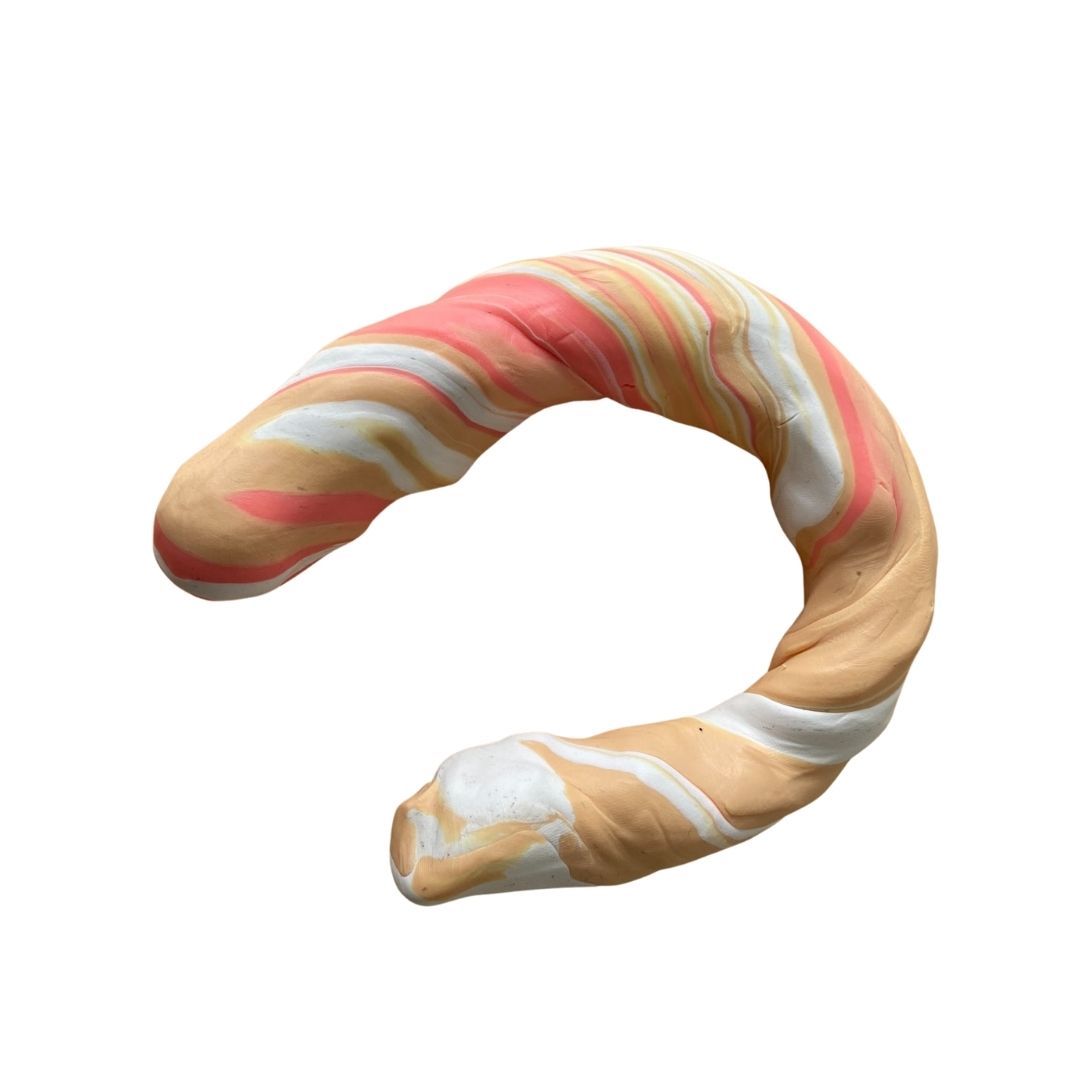
Take your soft, conditioned polymer clay colours and combine them. Using your hands, knead the clay until the colours start to soften further and swirl together.
If you're struggling to create a swirling effect, It can help to roll your joined clay into a log shape, and then roll it back over itself into a ball. Keep repeating this process until you are happy with the marbled effect
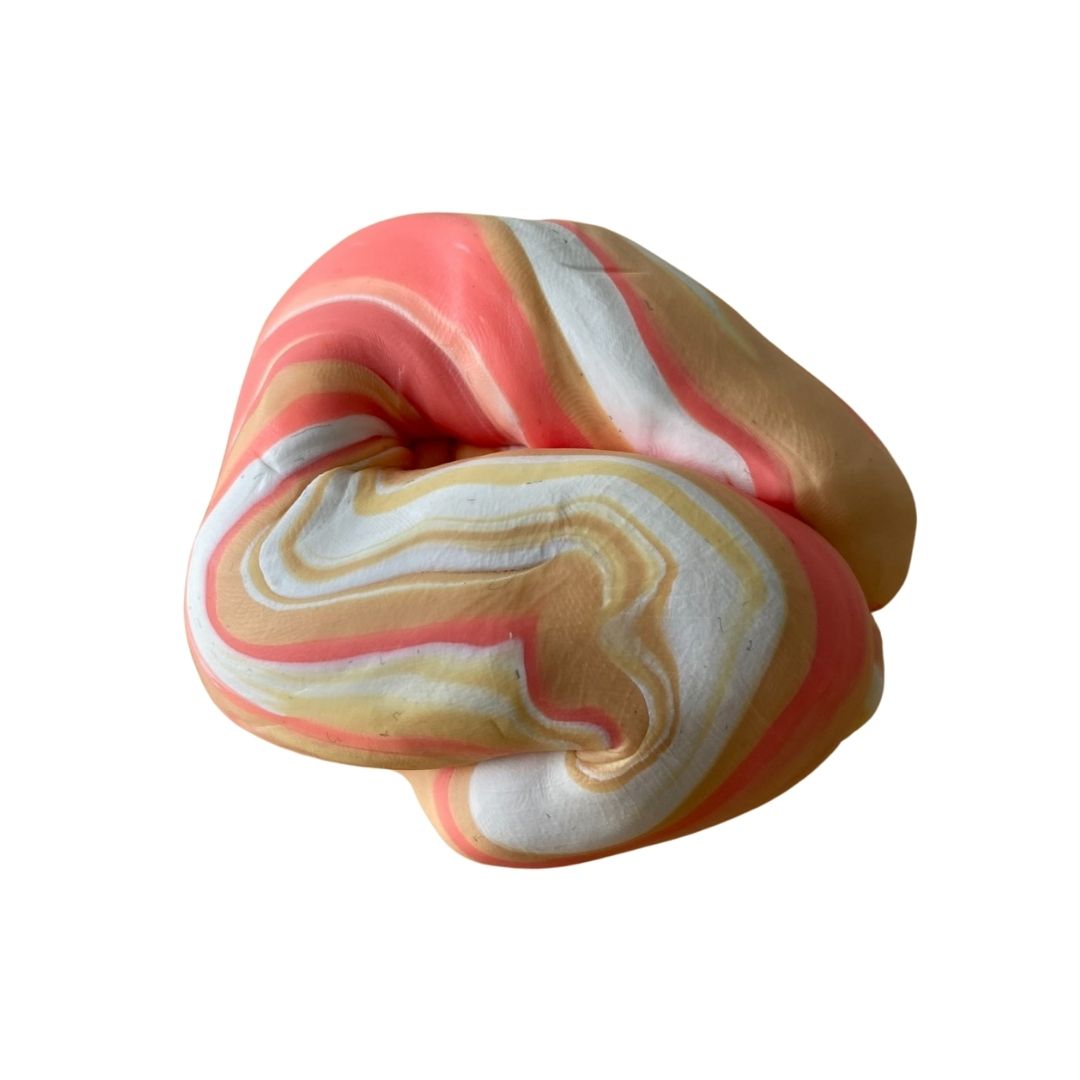
Step 3: Roll your polymer clay pieces into a ball

Once your clay is showing a swirling marble effect, roll it into a smooth ball. You can then take a rolling pin or metal drink bottle and roll the ball out into a flat shape.
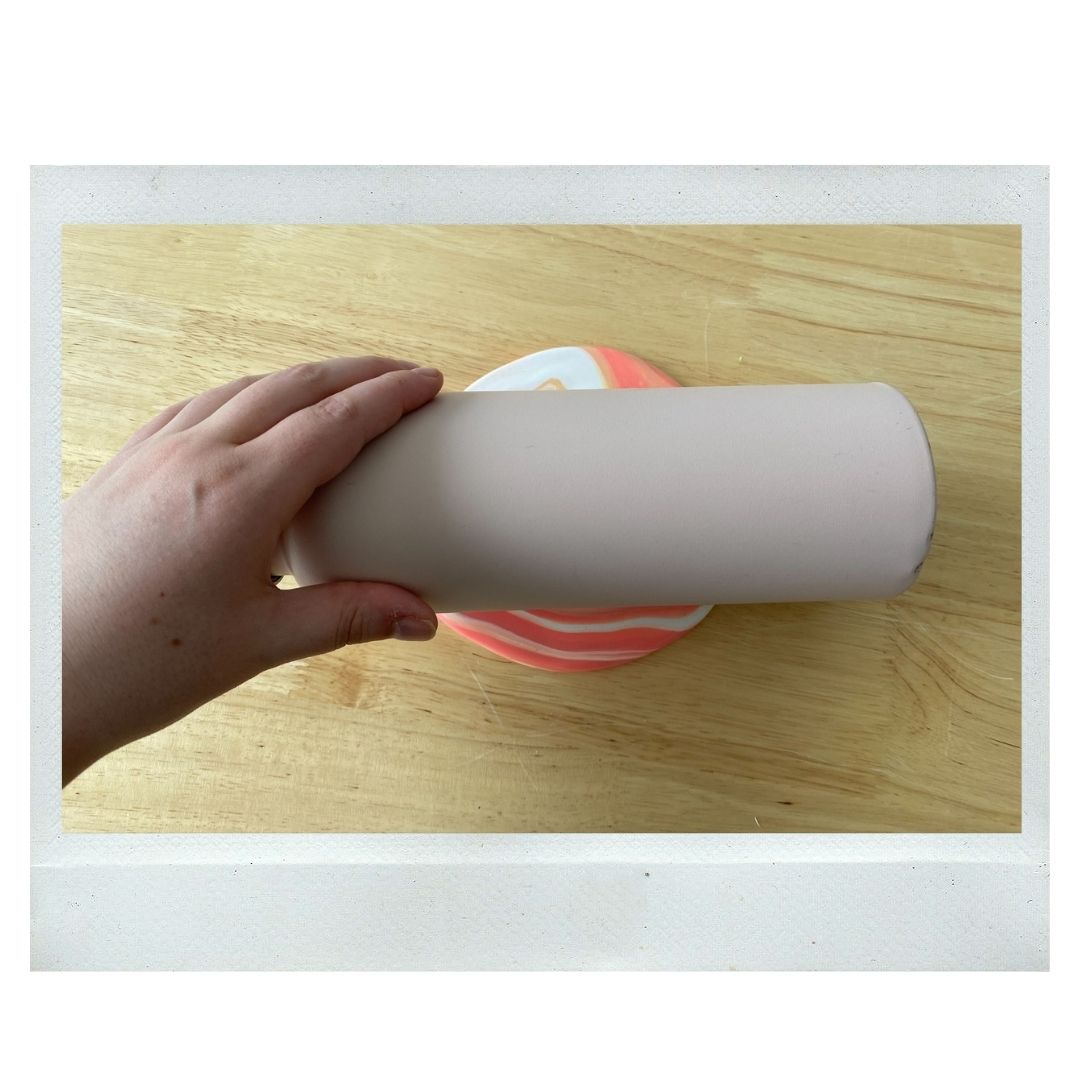
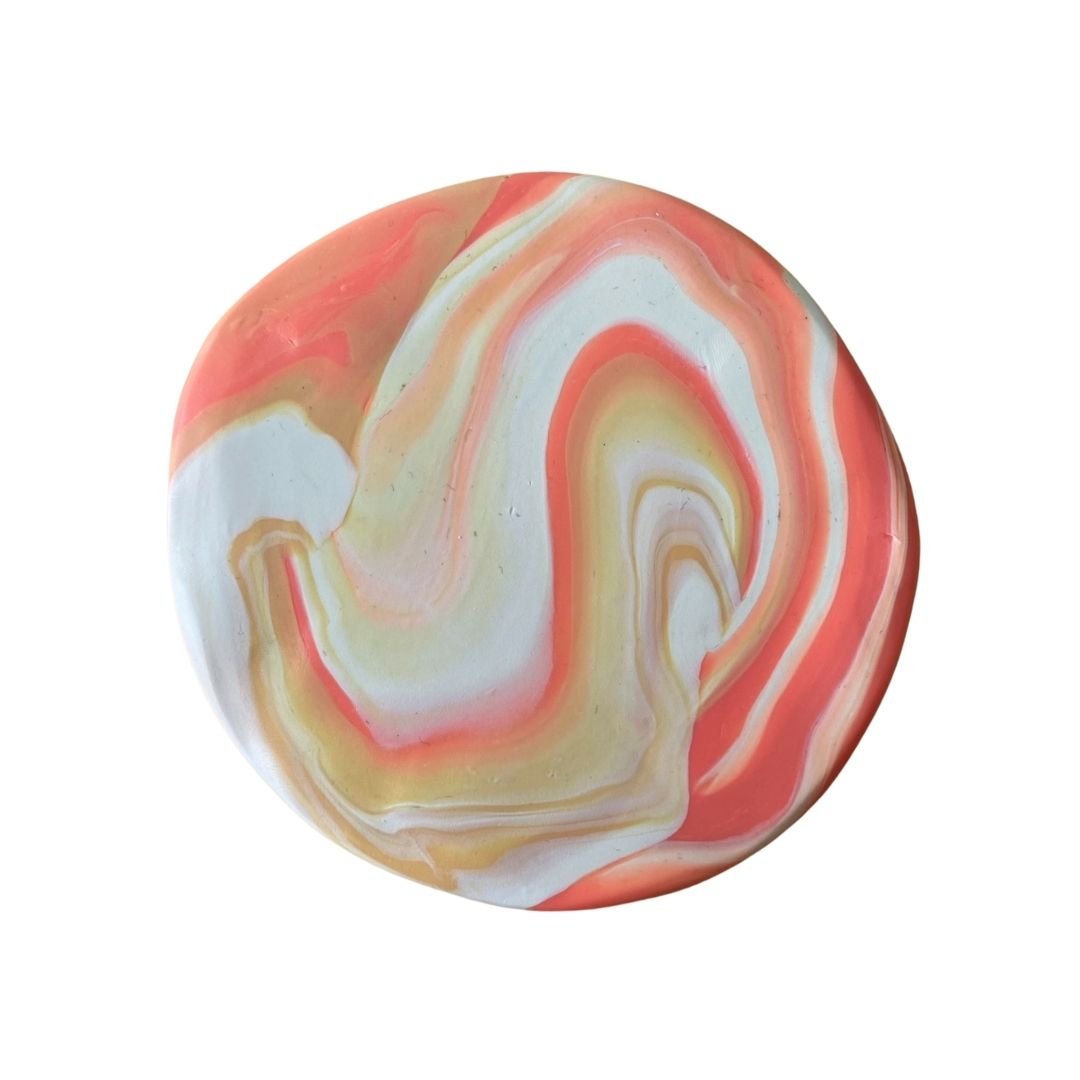
Now that your dish is starting to take form, you can cut around the edges for a neater edge using the clay tools, and can use your hands to fold up the edges to create little walls.
.jpg)
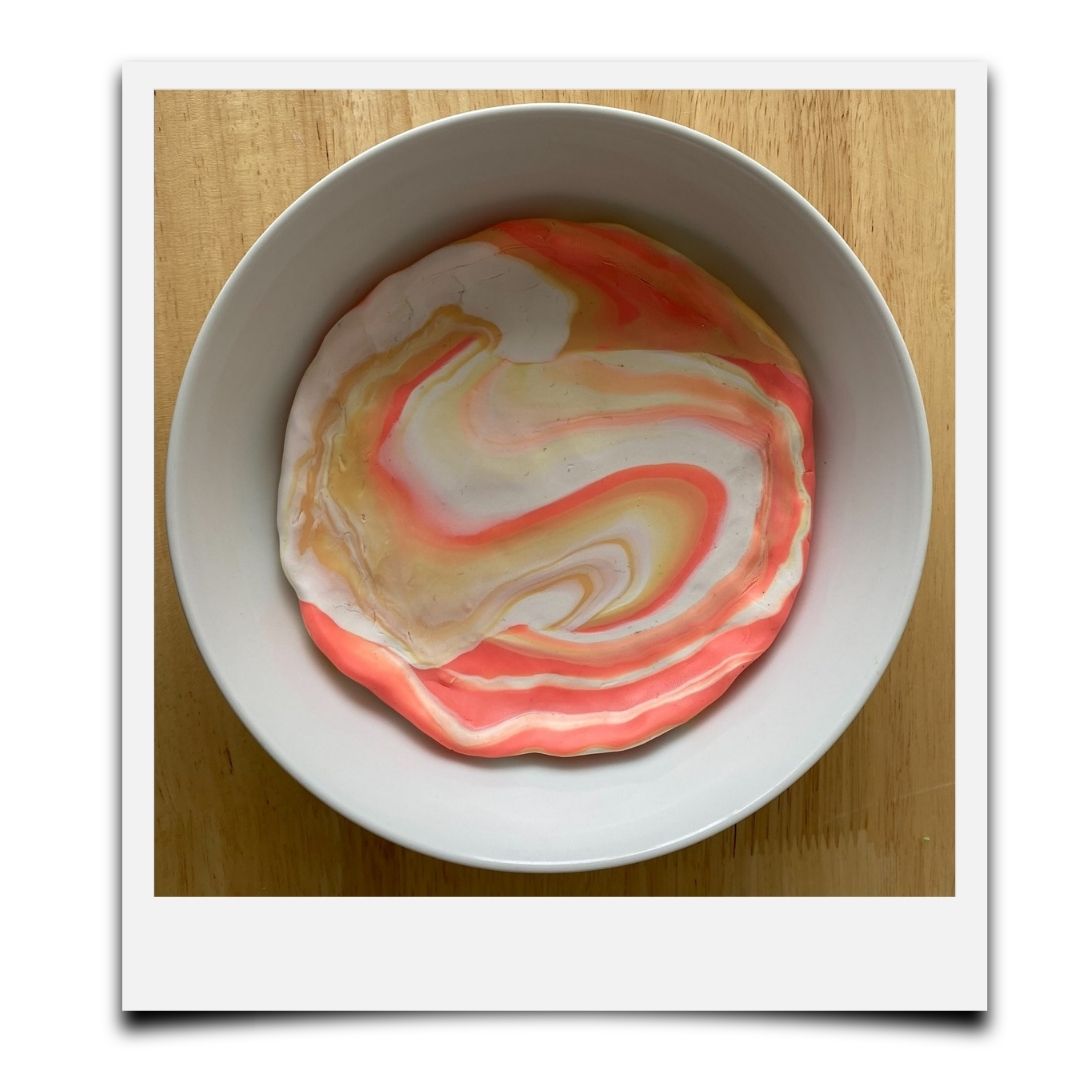
If you are wanting to create a bowl-like shape, you can take an ovenproof bowl, and place your dish in the centre to bake.
Step 4: Bake your clay tray
Time to bake!
Set your oven to 130°C and bake for 25-30 minutes.
Step 5: Cool
Once your tray is fully baked, leave it to cool on a drying rack. If you find your piece has discoloured at all, you can take some sandpaper and gently rub the clay until the true colours are revealed.
Optional: You can also add acrylic paint to your dried polymer clay piece.
.jpg)
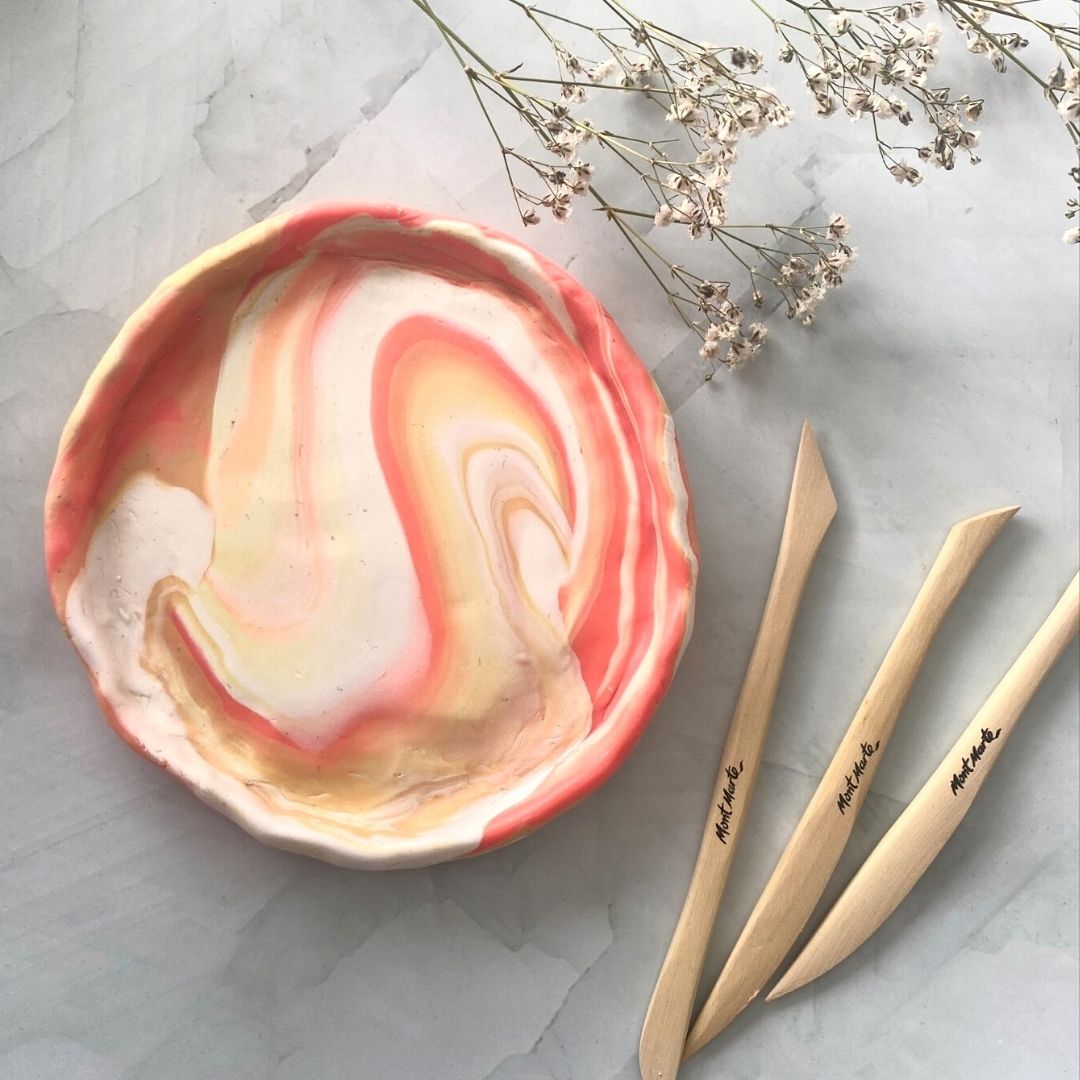
And Viola!! You are finished!
Time to style and show off your hand-made marble polymer clay tray
What polymer clay colours would you choose? How would you style your tray?
Don't forget to show us your Marble Tray by tagging us on Instagram @artshedonline for your chance to be featured!
Got questions? Send us an email at customerservice@artshedonline.com.au and our friendly team of artists will do their best to assist you.
Happy creating!