


How to make a Body Vase from Air Dry Clay
Author: Dana McGorlick-Appelman Date Posted:19 January 2022
Air Dry Clay is a fantastic sculpting medium for beginners and seasoned sculptors alike. Almost any decorative piece can be made from Air Dry Clay. There’s no need for a kiln or oven when it comes to setting air dry clay- simply leave it to dry in a cool dry area and the piece will set on its own, making it great for at-home DIY’s and practising your moulding skills.
If you’re just starting out in clay modelling and are looking for a creative activity and decorative DIY to spruce up your home, this Decorative Vase made with Air Dry Clay is a great place to start. The human form has been the muse for many artists for centuries, and this DIY makes a great creative activity to share with your partner or friends, or a great mindfulness me-time activity. The finished piece can be decorated using acrylic paints, and is great for holding dried flowers and floral arrangements, or as a stand-alone decorative sculpture.
You will need:
- Air Dry Clay (we used the Mont Marte Air Hardening Clay in White)
- Water
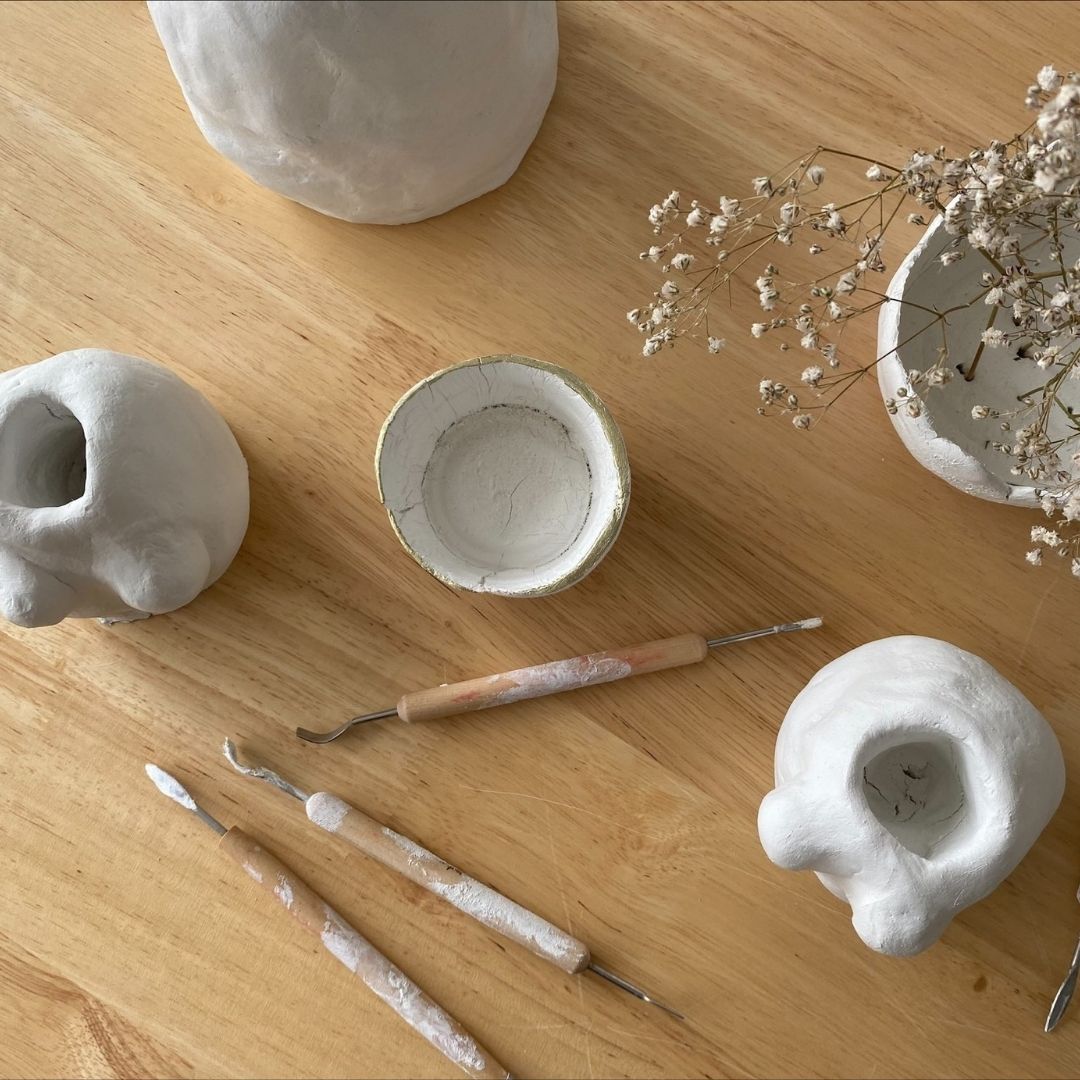
- Clay tools (we recommend the Mont Marte Sculpting - Clay Tool Set 11pc)
- Optional: Acrylic Paints and a Taklon Paint Brush
- We also recommend using a plate or paint palette to protect your workspace.
How to create a decorative body vase using Air Dry Clay
- Take a large piece of clay and start kneading it into a large egg shape
- Place the clay onto your palette or plate with a bit of force (but not too much) to keep your egg shape upright. This will form the body of the vase, and we want the base to be as flat as possible.
- You can smooth out the side of the body by dipping your hands in water and smoothing the edges with your hands
- Taking a clay tool, dig it into the top centre of your egg shape to form a well. You can make this larger by using your hands and water
- Taking 2 small pieces of clay, roll each into smooth balls.
- Taking a sharp clay tool, score on side of each ball, and gently score a small section of the torso of your vase. Apply the balls and smooth the edges to the torso to secure them.
- Smooth out any sections of the torso as you like.
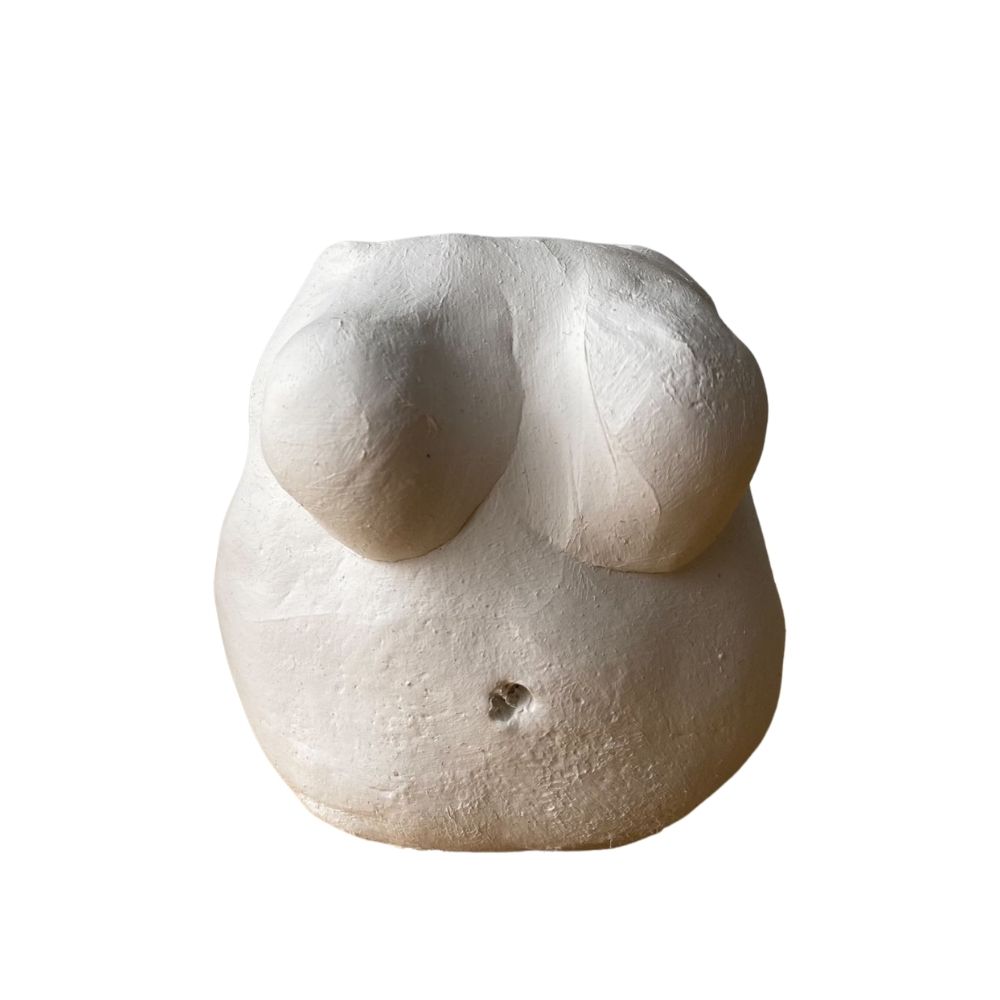
- Taking another sharp clay tool, gently carve a small whole in the shape of a belly button. You can also carve the shape legs into your piece if you like.
- Allow to dry completely. This may take anywhere from 24- 48 hours depending on the thickness of your piece and the humidity of the room.
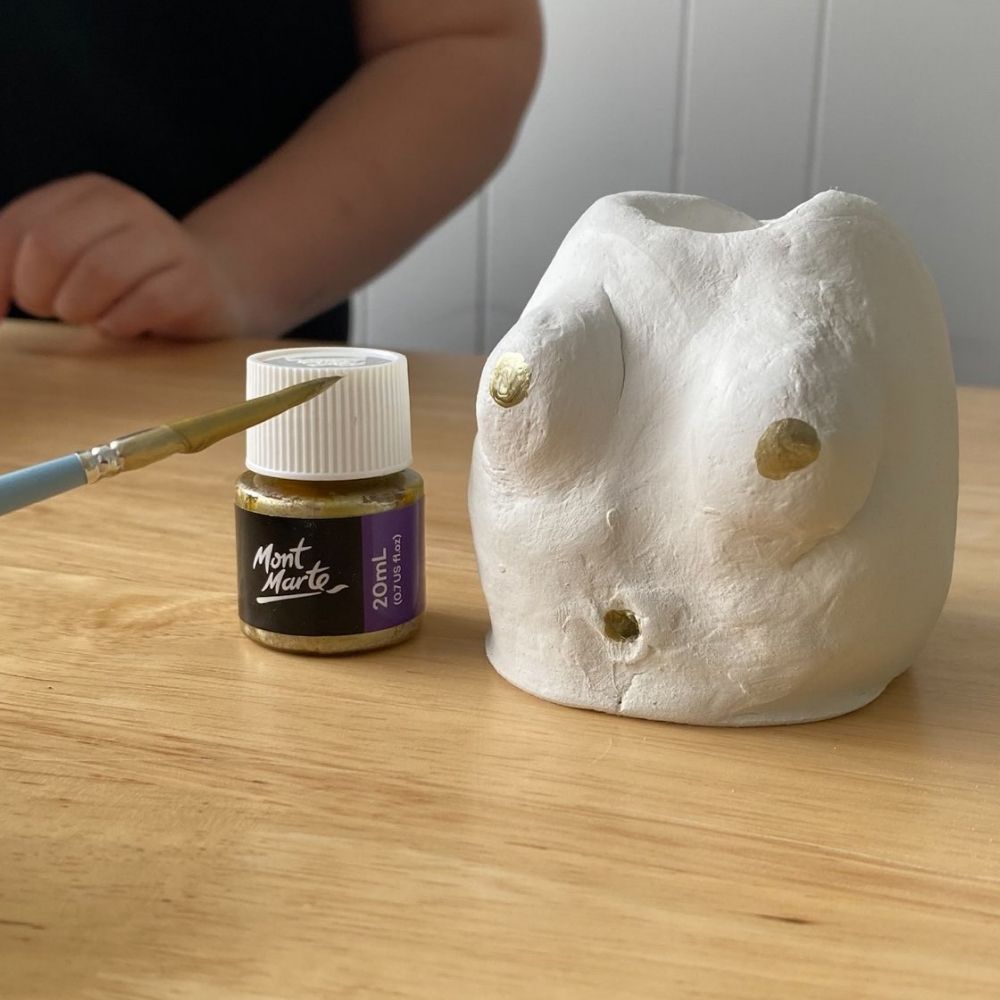
- Once your piece is fully dried, you can paint it with acrylic paint or apply a sealer. You can apply the acrylic paint using a Synthetic/ Taklon paint brush for a smooth application. Opt for a sealer like a matte acrylic medium, or create your own using a mix of 80% PVA glue to 20% water to create a creamy consistency, then coat your dried clay piece. You can then apply acrylic paint to your piece.
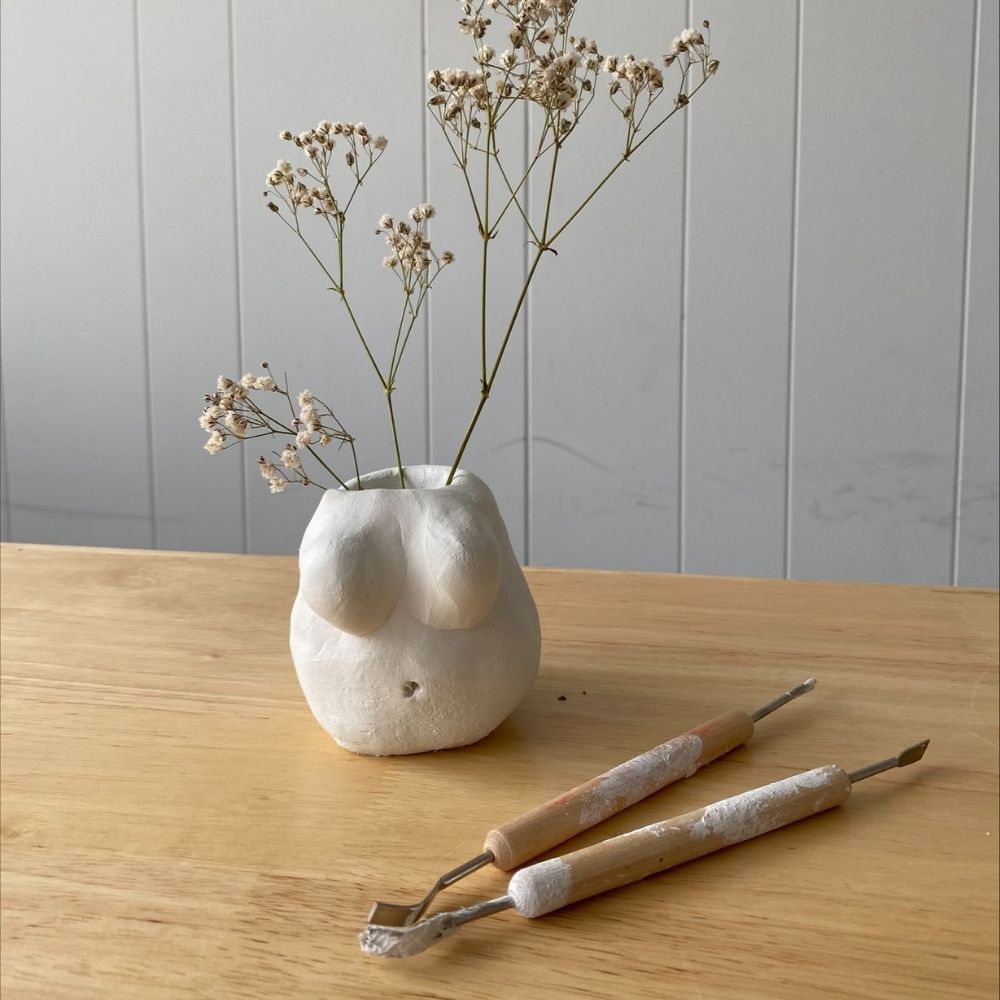
Voila! Your body sculpture/ vase is complete!
Don't forget to show us your clay creation by tagging us on Instagram @artshedonline for your chance to be featured!
Got questions? Send us an email at customerservice@artshedonline.com.au and our friendly team of artists will do their best to assist you.
Happy creating!