


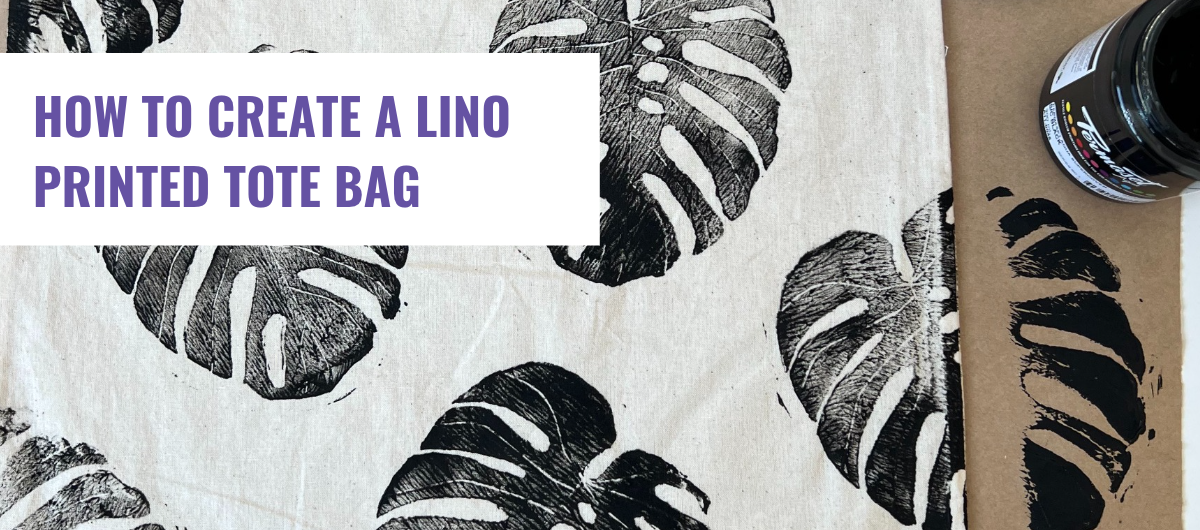
Create your very own Lino Printed Calico Bag with us!
Author: Tessa Date Posted:28 October 2022
Step 1:
Find a nice design you’d like to print on your calico tote bag. We chose a simple monstera leaf for this project. To create a simple DIY transfer, print off your image (don’t forget to flip it so it prints the right way around) on some plain white paper and take a graphite pencil, cover the blank side in graphite pencil. Flip the paper over to the printed side, place it on your lino block and trace the printed image. The graphite will transfer an outline of your design on to the lino for you to then start carving away!
.png)
Step 2:
Take your lino cutter set and start with a smaller, narrow head to begin the initial outline of your design. Keep in mind everything you cut away will not hold ink and everything that remains will.
The smaller lino cutter will allow you to create smaller and more intricate details, so once you have created the outline of your design, move to a slightly larger cutter to remove bigger areas of the lino that you don’t want to be printed. Once you’ve removed all the areas that you don’t want the ink to transfer from, go back in with a smaller cutter and add in some details, for our project we used the smaller cutter to create thin veins on the monstera leaf.
We then printed a couple of test prints and decided to cut away the excess lino around our design.
.png)
Step 3:
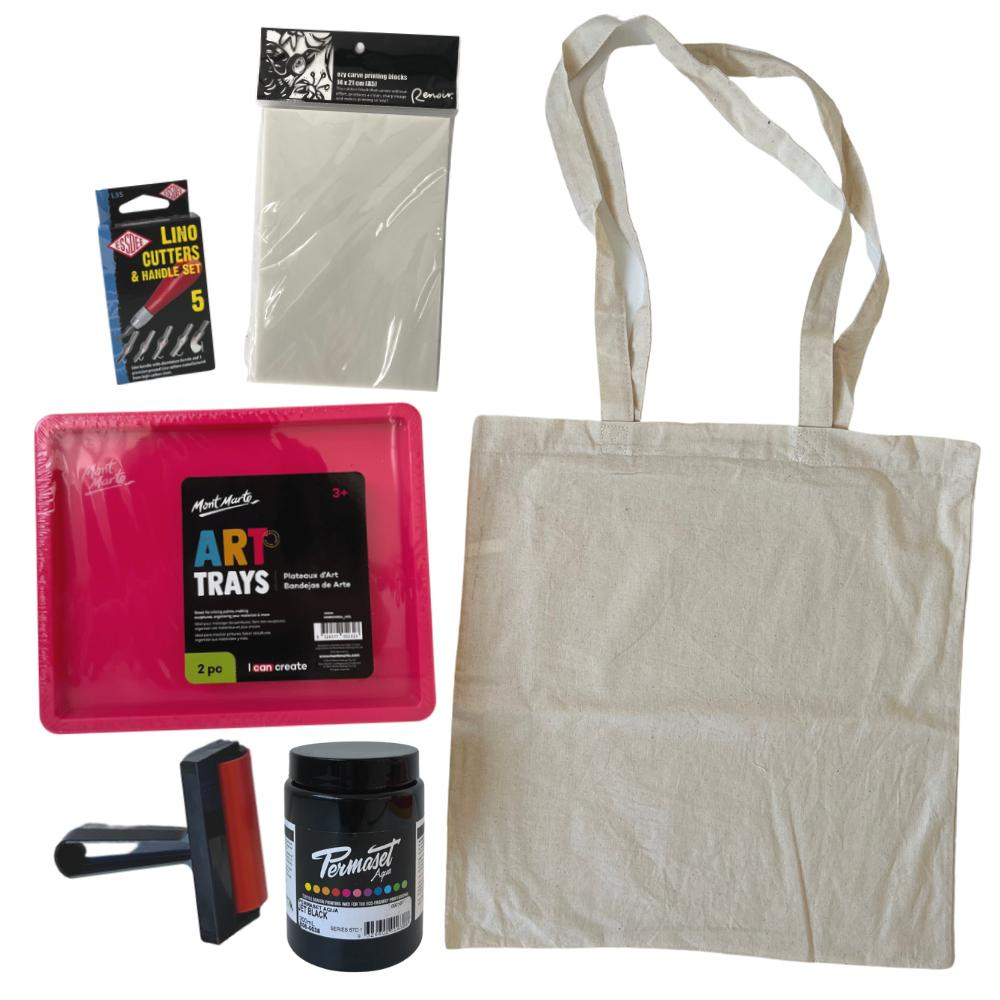
Once you’re happy with the design you’ve created, it’s time to get inking! Set up your space with your painting tray (we’re using as an inking tray), roller and ink. Make sure to put a piece of cardboard inside the calico bag to prevent the ink going through the fibres to the other side of the bag.
We used a palette knife to disperse the printing ink along the top of the tray. Then using the rubber roller pick up some of the ink you’ve spread out. Using the bottom half of the tray, start rolling back and forth both vertically and horizontally to keep spreading the ink evenly along the roller.
When you’ve got a nice even distribution of ink on the roller it’s then time to roll the ink onto your lino block design!
.png)
Step 4:
Roll the ink over your lino block design, using the same technique as before, rolling both horizontally and vertically to get a nice even spread of ink across the design.
Take the plunge and flip it over and press it down onto the calico bag! Apply even pressure and hold down for about 15 - 20 seconds. Depending on how you’d like your design to look you can repeat this process and create a random organic pattern all over the bag like we did or just do one central print on the bag, the choice is all yours!!
.png)
Step 5:
After you’ve created your masterpiece fashion statement tote bag design, you need to heat set it to make sure that ink isn’t going anywhere! Once it’s completely dry you can iron it, tumble dry it or bake it in the oven.
Permaset recommends using one of the following methods:
- Bake: after air drying, fold piece/garment, wrap in AlFoil (Aluminium Foil) and bake at low heat (90°C; 194°F) in a domestic oven.
- Tumble dry: after air drying, place in tumble-dryer for around 30 minutes and test.
Step 6:
It’s time to model your wares, get down to Art Shed and fill up your bag with some more supplies because after this project, you’ll be addicted and wanting to lino print on everything!!
.png)
We've put together an exclusive Lino Printing Kit just for Art Shed customers. It includes everything you need to make your very own personalised designed tote bag. Check out the Lino Printing Calico Bag Set here.
Have fun and as always, stay creative ;)