


Alcohol Markers vs Paint Pens vs Brush Pens: What’s the Difference and Which Should You Use?
Author: The Art Shed Team Date Posted:23 March 2026
Choosing between alcohol markers, paint pens, and brush pens can be confusing, especially when they look similar but behave completely differently on paper. If you’ve ever struggled with streaky blends, dull colour, or pens that just aren’t doing what you expected, it’s usually not the pen, it’s the combination of tool, paper, and technique.
In this guide, we break down the difference between alcohol markers vs paint pens vs brush pens, how each one works, what they’re best for, and how to get smoother blends, stronger colour, and better results from your materials.
Whether you’re into illustration, lettering, mixed media, or just figuring out what to add to your kit, this will help you choose the right pen and use it properly.
Understanding the Three Types of Pens and Markers
Before we dive into the details, here’s a quick breakdown to get your bearings.
Alcohol markers are all about blending and smooth, seamless gradients, perfect for shading, rendering, and that polished illustration style.
Paint pens are built for opacity and versatility, giving you bold, solid colour that sits on top of the surface and works across paper, wood, glass, and more.
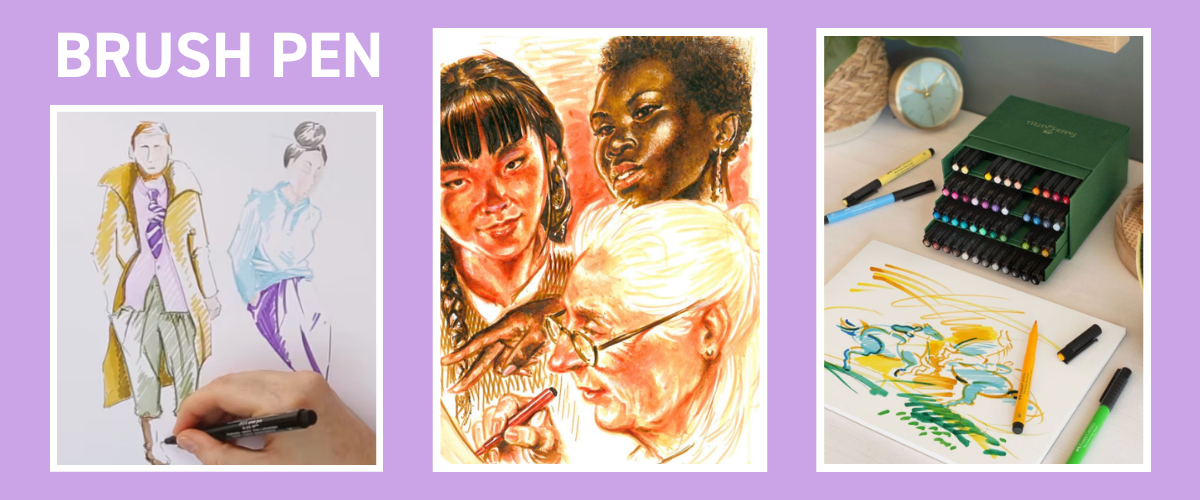
Brush pens sit in their own lane, focused on line variation, pressure control, and expressive strokes, which makes them a favourite for lettering and clean linework.
They’re not interchangeable, and most beginner frustration comes from using the right pen in the wrong way, or on the wrong surface.
Below, we’ll break each one down properly, how they work, what they’re best for, and how to actually get the results you’re after.

Alcohol Markers Explained
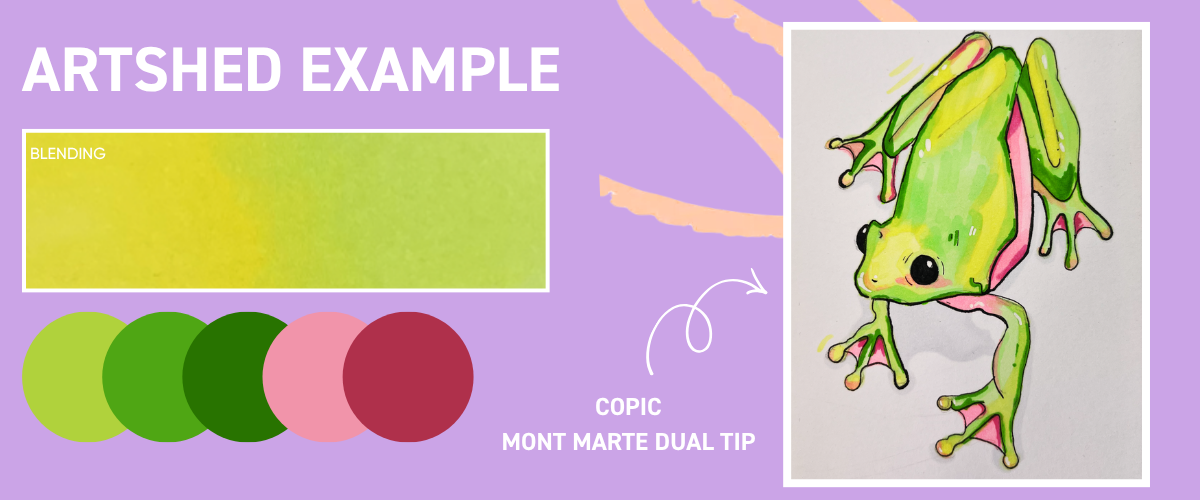
In the blending example above, I used a mix of Copic markers and Mont Marte Dual Tip Alcohol Markers on a Mont Marte marker Pad to create the gradients, layering and swatches you can see. Everything in that piece was done purely with alcohol markers so you can clearly see how they behave when used properly on the right surface.
What Are Alcohol Markers?
Alcohol markers use dye-based ink carried in an alcohol solvent. When you lay colour down, the alcohol evaporates quickly and leaves the dye evenly distributed across the surface. That quick evaporation is what allows colours to blend so smoothly into each other.
Unlike paint pens, alcohol markers are translucent. They don’t fully cover what’s underneath. Instead, they build on top of previous layers. Each new pass deepens the tone and creates dimension. That layering ability is what gives alcohol marker artwork that smooth, almost airbrushed look.
When most people picture artists rendering detailed illustrations with markers, this is what they’re thinking of. Alcohol markers are hugely popular in manga and comic communities, especially among Copic artists. They’re a staple in fashion design, character art, product rendering and concept illustration because they allow controlled shading and realistic depth.
If you were part of the adult colouring book wave around 2024–2025, especially those highly detailed Coco Wyo-style books, alcohol markers were the go-to. They made it possible to achieve those satisfying, buttery blends and rich gradients that just aren’t achievable with standard felt tips.
Out of all the markers we’re covering in this guide, alcohol markers are the strongest choice if your goal is realism. Skin tones, fabric folds, shadows, glass reflections, they’re built for that kind of depth. If blending is your priority, this is your medium.
How to Create the Smoothest Blends
If your blends are looking a bit streaky or patchy, don’t stress, it’s usually just a technique tweak.
Alcohol markers are made for smooth blending because the ink is translucent and reactivates as you layer. That means colours can melt into each other nicely… if you work with the ink, not against it.
First tip: work in small sections. These things dry quicker than you think, so if one area dries before you blend the next, you’ll end up with those harsh edges instead of a soft fade.
When you’re laying colour down, use small circular motions rather than straight back-and-forth lines. Lines tend to leave streaks, especially in bigger areas, while circular movements help spread the ink evenly and keep things looking nice and smooth.
Also, don’t be too timid with it. A super light layer won’t always give the ink enough to blend properly. You don’t need to drown the page, but a slightly more saturated base will help colours move and merge way better.
Try to layer while the ink is still a little bit wet so the colours can naturally blend into each other. If everything dries in between layers, you’ll notice those edges a lot more.
And if things get a bit patchy, a colourless blender can help push pigment around and soften everything back out. Think of it as your little fixer-upper tool.
Once you get the hang of it, this is where alcohol markers really shine, especially for skin tones, hair, soft shadows, highlights, and anything with a bit of depth or texture. It’s less about bold blocks of colour and more about those smooth, satisfying transitions.
Best Paper for Alcohol Markers
If there’s one thing that makes or breaks alcohol marker performance, it’s paper.
Alcohol ink wants to move. If the surface absorbs it too quickly, blending becomes streaky. If the paper is textured, the ink spreads unpredictably.
For best results, choose:
Smooth marker pads
Bleedproof paper
Smooth bristol board
Marker pads are often around 70–120gsm, which might sound lighter than mixed media paper. But marker paper is coated. That coating slows down absorption just enough to give you working time for blending
Common Alcohol Marker Mistakes (And How to Fix Them)
Using the wrong paper
Most blending issues aren’t marker issues. They’re paper issues. If your surface is too absorbent or textured, the ink won’t behave properly. Switching to a smooth marker pad instantly improves results.
Overworking the same area
Because alcohol ink reactivates slightly, repeatedly layering one spot can oversaturate the paper. This can break down the surface and create patchiness. Work in light layers and build depth gradually instead.
Expecting full coverage over dark areas
Alcohol markers are translucent. They’re not designed to completely block out darker colours underneath. If you need bold, opaque coverage, paint pens are the better tool.
Using them on wood or canvas
Alcohol markers are formulated for paper. On porous surfaces like raw wood or canvas, the ink spreads and loses control. They’re not built for that job.
Forgetting a scrap sheet underneath
Bleed-through is completely normal. Always place a spare sheet under your artwork to protect your surface.
Storing markers upright
Alcohol markers should be stored horizontally. This keeps ink evenly distributed between both nibs and prevents one end from drying out faster than the other.
Understanding these small details is what turns frustration into confidence.
Choosing the Right Alcohol Markers
If you’re after industry-standard performance for illustration, character work and highly rendered pieces, Copic markers are known for their consistency, refill options and extensive colour range. They’re a go-to in manga, concept art and professional illustration for a reason.
For a more accessible option that still blends beautifully, Mont Marte Dual Tip Alcohol Markers offer smooth application and reliable layering, especially when used on proper marker paper. They’re a great starting point for building confidence with blending.
If you want more control within a single marker, Chameleon markers offer a unique blending system that allows for lighter-to-darker transitions without constantly switching colours, making them especially useful for learning shading.
All three work within the same alcohol-based system. The real difference comes down to nib feel, ink flow and refillability, not whether blending is possible.
What Are Paint Pens?
Paint pens contain acrylic paint inside a valve-controlled pen body. When you shake them, a small mixing ball redistributes the pigment. When you gently press the nib, the valve system allows paint to flow down into the tip.
Unlike alcohol markers, paint pens are opaque. They don’t soak into paper the same way. Instead, they sit on top of the surface and dry as a thin paint film.
The easiest way to understand them is this:
Think of a paint pen as paint in pen form, not a regular marker.
That distinction changes everything.
Because they’re paint-based, they offer bold, solid colour that can cover darker surfaces underneath. You can layer light over dark. You can paint on wood. You can work on glass. You can create vibrant blocks of colour without worrying about translucency.
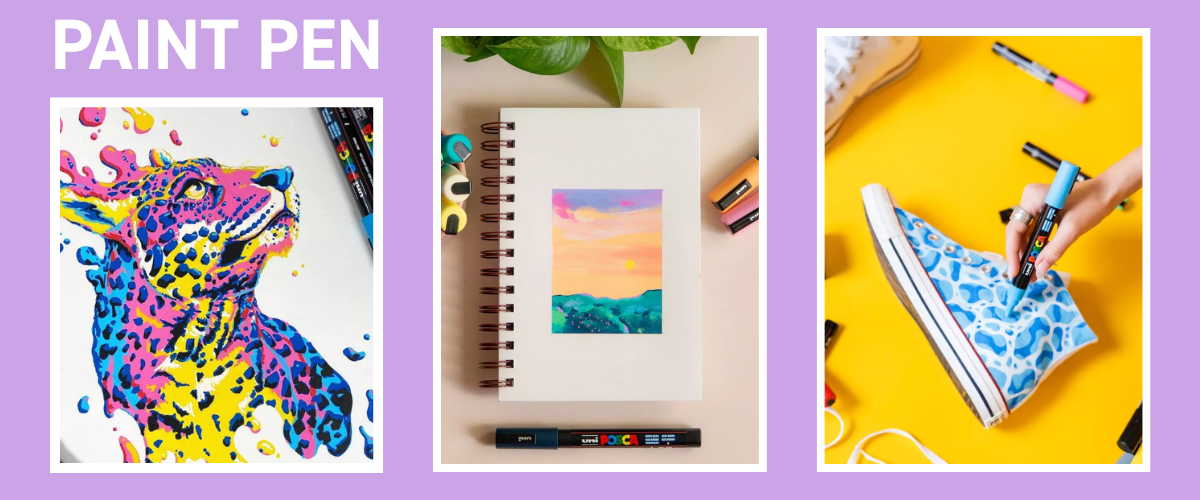
This is why paint pens are a favourite across street-style artwork, bold cartoon illustration, graphic design, mixed media layering, murals, customisation projects, surf art, skate decks, and decorative work on canvas, wood, or everyday objects.
If alcohol markers are all about soft blends and realism, paint pens are where you go for impact, think strong lines, bright colour, and clean, graphic shapes.
Opacity: The Big Difference
What makes paint pens really fun isn’t just that they’re opaque, it’s what that lets you do with them.
If you’re into cartooning or graphic-style work, they’re kind of a dream. You can block in super clean shapes, then go back over the top with details or highlights without worrying about the layers underneath showing through. Everything stays crisp and intentional, which is exactly what you want for that bold, illustrated look.
They’re also great if you like building your work up in layers. You can stack colours over each other and they’ll stay just as vibrant, instead of blending into a muddy mix. That opens up a lot of freedom to experiment, fix things, or completely change direction halfway through a piece.
A lot of artists even use them alongside alcohol markers or “Copic-style” rendering. You can do your soft blends first, then come in with paint pens to sharpen edges, add graphic elements, or punch in highlights that really stand out.
So while they’re not about soft blending, they’re perfect when you want control, contrast, and colour that actually holds its own on top of everything else.
Best Surfaces for Paint Pens
One of the biggest strengths of paint pens is versatility.
They work beautifully on:
Yupo (synthetic, non-absorbent paper)
Canvas
Sealed wood
Cardstock
Glass
Metal
Plastic
Because they’re acrylic-based, they adhere to far more surfaces than alcohol markers ever could.
If you’re working on objects, murals, custom boards or layered mixed media projects, paint pens are the stronger choice.
Compared to alcohol markers, paint pens win when it comes to multi-surface flexibility.
What About Blending?
Paint pens can blend, but that’s not really what they’re built for.
Because the ink is acrylic paint, once it starts drying it forms a film. That means your blending window is much shorter than with alcohol markers. You can blend slightly by working quickly while the paint is still wet, or by layering colours while they’re tacky. For example, you might soften the edge between two colours if you apply them back-to-back and lightly overlap the area.
However, you won’t get the same seamless gradients that alcohol markers produce. Paint pens are designed for bold, opaque coverage and graphic impact rather than smooth tonal transitions.
If your goal is soft, realistic shading, alcohol markers are the better tool. If your goal is vibrant colour, strong linework and surface versatility, paint pens are exactly where you want to be.
Common Paint Pen Mistakes (And How to Avoid Them)
Not shaking long enough
Give them a proper shake. The pigment settles inside, so if you rush it, the paint can come out watery or uneven. You’ll know it’s ready when you can clearly hear the mixing ball moving around.
Pressing too hard when priming
Go easy here. Gentle pumps are all you need to get the paint flowing. Pressing too hard can flood the nib or mess with the valve, and that’s when things start getting messy.
Using thin or low-quality paper
Paint pens carry a bit of moisture, so super thin paper can warp or buckle pretty quickly. Heavier paper, cardstock, or smoother surfaces will give you a much nicer result.
Expecting alcohol-style blending
Paint pens are built for layering, not blending. If you try to treat them like alcohol markers, you’ll usually end up with patchy areas instead of smooth gradients.
Not allowing layers to dry
Since you’re working with acrylic paint, give each layer a moment to dry before going back over it. If you don’t, you can lift the colour underneath instead of building on top of it.
Choosing the Right Paint Pens
If you’re after strong, reliable opacity for bold graphic work and street-inspired styles, Posca is widely recognised for consistency and vibrant pigment.
For larger sets or broader coverage options, Mont Marte Acrylic Paint Pens offer both fine and broad tip formats that work well for mixed media and decorative applications.
If you’re working on murals, surf art or more professional acrylic-based projects, brands like Liquitex and Surf Paint Pens bring artist-grade acrylic performance into pen form.
And if you’re leaning into urban or custom object work, ranges like Kent Urban fit naturally into that bold, surface-ready category.
The key difference isn’t whether they’re “markers” — it’s that they behave like paint. Once you start thinking of them as portable acrylic paint rather than traditional markers, their strengths become much clearer.
Brush Pens Explained
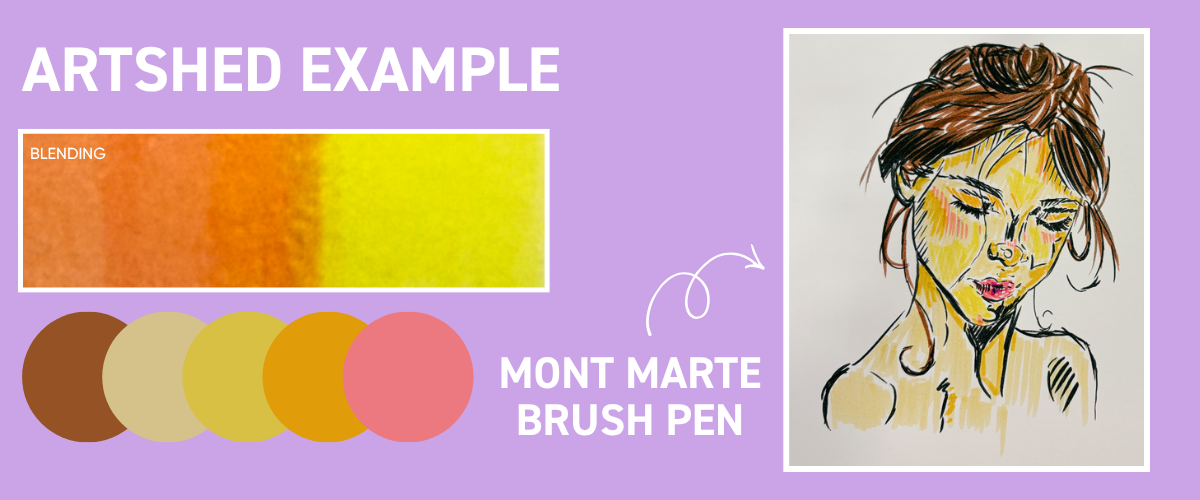
For the brush pen example above, I used Mont Marte Real Brush Pens to create the artwork, then played around with different surfaces to see how they behaved.
Before we get into it, there’s one thing worth clearing up straight away.
A brush pen isn’t just an alcohol marker with a fancy tip, and it’s not a paint pen either. It’s its own thing, and once you understand that, everything clicks a lot easier.
What Are Brush Pens?
Brush pens use water-based ink and have a flexible brush-style tip, usually made from nylon or fibre.
The easiest way to think about them is like your standard felt-tip marker… but with way more control.
Because of that flexible tip, you can change your line thickness just by adjusting pressure. Light hand gives you thin, delicate lines, and pressing a bit more gives you those thicker, bolder strokes.
That’s exactly why people love them for things like lettering, calligraphy, florals, comic inking, and those clean, expressive illustration styles you see in Japanese art. They’re also a favourite for journaling and planners because you can write and illustrate with the same pen.
Compared to alcohol markers and paint pens, brush pens are less about blending big areas and more about how your lines look. They really shine when you’re focusing on clean strokes, smooth curves, and expressive linework.
How Brush Pens Behave on Paper
Brush pens are pretty picky about paper.
Because the tip is soft and flexible, rough or textured paper can catch on it and wear it down quickly. Smooth paper is where they feel their best.
On smoother surfaces, you’ll get clean, controlled lines, less feathering, and a tip that holds its shape for way longer. Everything just feels easier to manage.
On rougher paper, the ink can spread into the fibres, edges can look a bit fuzzy, and the tip can start to fray faster. It can still work, but it won’t feel as nice or consistent.
Since the ink is water-based, it absorbs straight into the paper. On good smooth paper, that absorption is nice and even. On textured paper, it can get a bit unpredictable.
If you’re doing lettering or anything detailed, smooth paper isn’t just a “nice to have” it makes a massive difference.
Can You Blend Brush Pens?
You can blend brush pens… just not in the same way you would with alcohol markers.
Some will let you soften edges with a bit of water or layer colours while they’re still slightly wet, which can give you a gentle wash effect or soft transitions.
But because the ink soaks in pretty quickly, your blending window is short. You’re not going to get those super smooth, seamless gradients you’d expect from alcohol markers.
They’re better thought of as a line-and-fill tool rather than a blending tool. Perfect for filling smaller areas, adding flat colour, building simple shadows, and keeping things clean and controlled.
If your goal is smooth gradients, alcohol markers will do that better. If you’re chasing expressive lines and pressure variation, that’s where brush pens really shine.
Common Brush Pen Mistakes (And How to Avoid Them)
Using rough or textured paper
Rough paper can chew through your brush tips pretty quickly. The fibres catch on the nib and cause fraying, so sticking to smooth paper will keep your pens (and your lines) looking way better for longer.
Pressing too hard
You don’t need to force it. The brush tip is designed to respond to light pressure, so let it do its thing. Pushing too hard flattens the tip and shortens its lifespan.
Overdoing it with water
If you’re blending with water, keep it light. Too much can cause the paper to buckle and the ink to bleed more than you want.
Expecting alcohol-style blending
Brush pens aren’t built for big, seamless gradients. Trying to force that usually ends in muddy colour instead of smooth blends.
Leaving them uncapped
Because they’re water-based, they dry out faster than alcohol markers. Always pop the cap back on properly so they’re ready to go next time.
Choosing the Right Brush Pens
If you’re into lettering, journaling, or decorative scripts, Mont Marte Real Brush Pens and Pentel Artist Brush Sign Pens are great for smooth control and consistent ink flow.
For illustration and linework, Molotow Blackliner Brush Pens and Faber Castell Pitt Artist Brush Pens are solid picks, especially if you want strong, reliable lines that hold up well over time.
At the end of the day, brush pens are all about expression. They’re not trying to be a blending tool or an all-surface pen. They’re made for clean strokes, controlled pressure, and lines that actually feel like they’ve got personality.
Once you start treating them like a brush in pen form, rather than just another marker, everything starts to make a lot more sense.
Why Paper Matters (More Than You Think)
If you’ve ever used the same pen on two different papers and thought why does this look completely different?… you’re not imagining it.
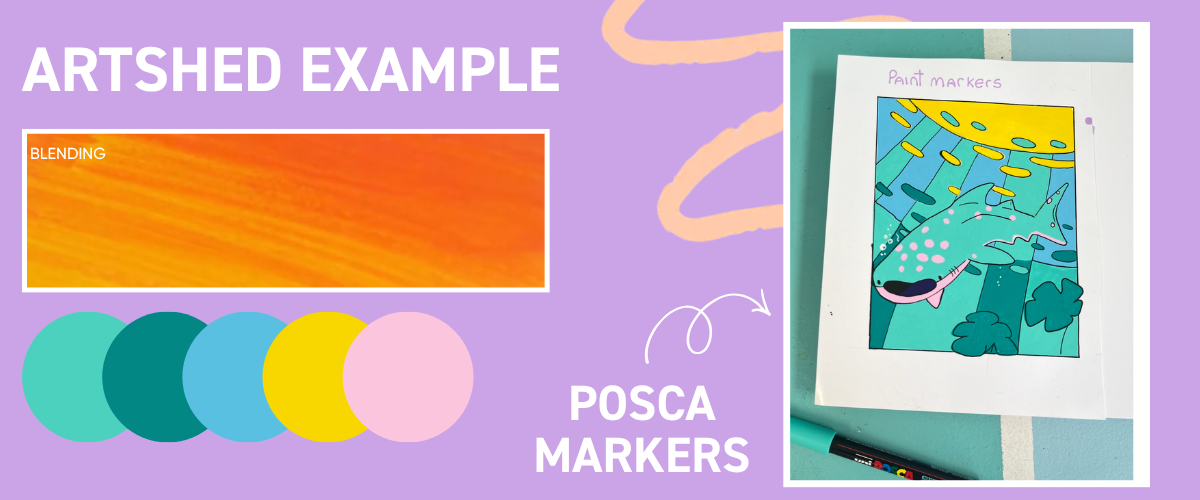
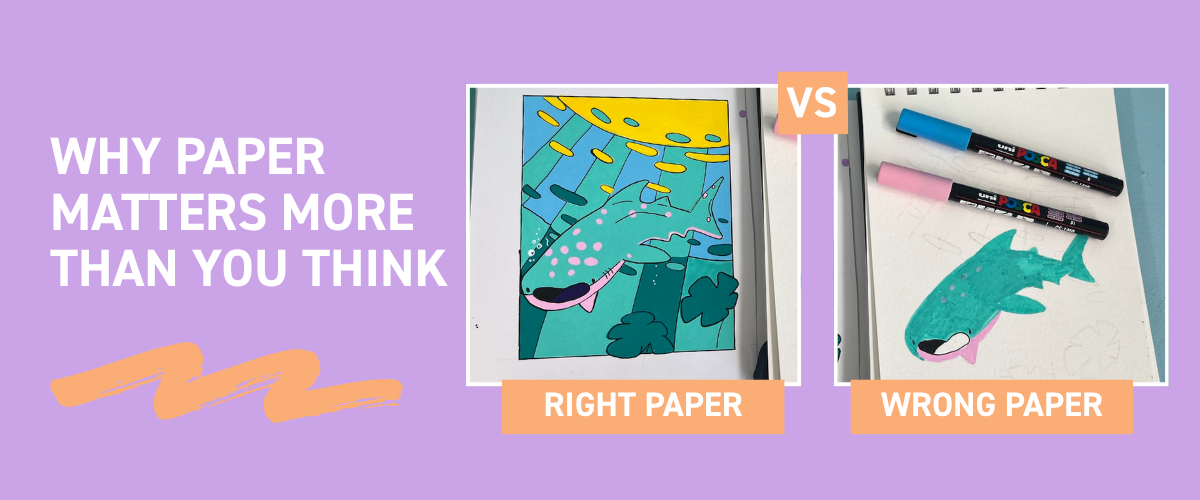
For the Posca example above, the exact same artwork was done on two surfaces. On smooth Bristol paper, the colour came out bold, even, and super satisfying to work with. On a more textured surface, it looked duller, slightly patchy, and the paint didn’t sit as cleanly.
Same pen. Same technique. Totally different result.
It all comes down to how the surface interacts with the paint.
Smooth papers have a tighter surface, which lets paint and ink sit on top. That’s why colours look more vibrant, layers stay crisp, and everything blends or layers the way you expect.
More textured or absorbent papers pull the paint into the fibres. That can break up your coverage, dull your colour, and make everything feel a bit harder to control.
Once you see it side by side, it clicks pretty quickly, paper isn’t just a background, it’s part of the result.
Paper Types (And When to Use Them)
Not all paper is built the same, and the right one can make your tools feel 10x better to use.
Bristol Paper (Smooth Finish)
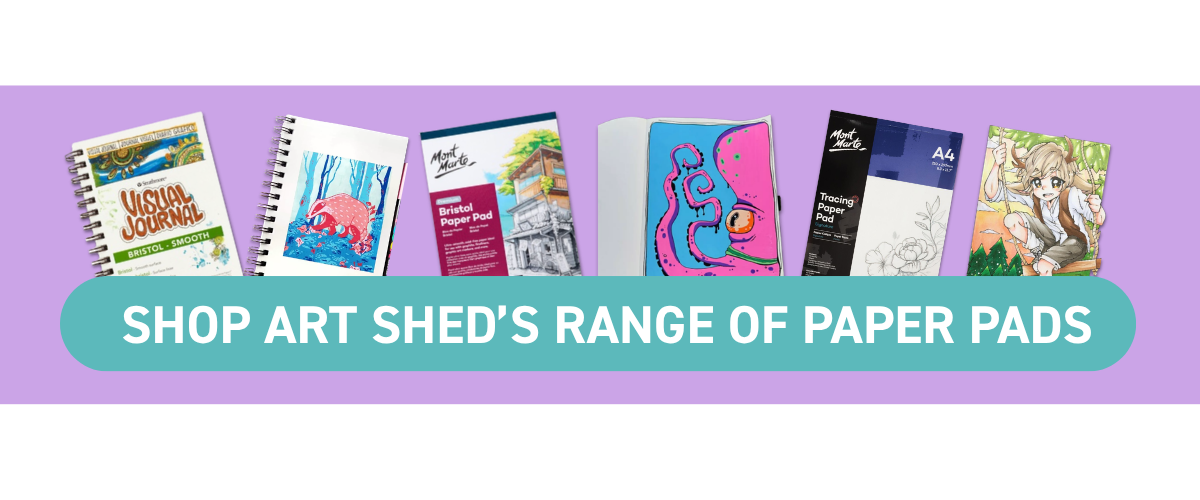
Bristol is a go-to for markers and paint pens, especially if you’re chasing clean, professional-looking results. Smooth Bristol has a flat, tight surface that keeps colours bold and edges crisp, which is exactly what you want for things like Posca work, alcohol marker blends, and detailed linework. Options like the Mont Marte Bristol Paper Pad or the Strathmore Wire Bound Bristol Paper Pad are solid picks for this kind of finish.
Marker Paper (Bleedproof Pads)
Marker paper is specifically made for alcohol markers. It’s thinner, but it has a coated surface that controls how the ink sits and moves, which is what gives you those smooth, seamless blends. If you’re doing Copic-style rendering, something like the X-Press It Blending Card Pad, Mont Marte Premium Bleedproof Marker Pad, or Art Spectrum Bleedproof Paper Pad will make a noticeable difference straight away.
Yupo Paper (Non-Absorbent Surface)
Yupo is a bit of a wildcard, but in the best way. It’s completely non-absorbent, which means ink and paint sit entirely on the surface instead of soaking in. This gives you incredibly bold colour, unique blending effects, and the ability to move pigment around in ways you can’t on traditional paper. The Art Spectrum Yupo Paper Pad is a great option if you want to experiment with something a bit different.
GSM (Why Thickness Actually Matters)
GSM stands for grams per square metre, and it basically tells you how thick your paper is.
Lower GSM papers are thinner and more likely to buckle, bleed, or struggle with heavier ink and paint.
Higher GSM papers are thicker and more stable, which means they can handle layering, moisture, and repeated passes without breaking down.
If your paper is too thin, even the best pens can look streaky or uneven. Sometimes it’s not your technique, it’s just the paper not keeping up.
Hot Press vs Cold Press (Surface Texture Explained)
This is where surface texture really comes into play.
Hot Press Paper
Hot press paper is smooth and flat, which makes it ideal for markers, brush pens, and paint pens. You’ll get cleaner lines, more even colour, and better overall control.
Cold Press Paper
Cold press paper has more texture, often called “tooth.” It’s great for watercolour, but for markers and paint pens, that texture can cause uneven coverage, feathering, and faster nib wear.
If you’re aiming for smooth blends or crisp lines, hot press or smooth surfaces are the way to go.
Matching Paper to Your Medium
If you want your tools to actually perform the way they’re supposed to, pairing them with the right paper makes all the difference.
Alcohol markers work best on smooth, coated marker paper like the X-Press It Blending Card Pad or Mont Marte Premium Bleedproof Marker Pad, where the ink can glide and blend without soaking in too fast.
Paint pens love smooth, sturdy surfaces like Bristol, think Mont Marte Bristol Paper Pad or Strathmore Bristol, where the paint can sit boldly on top and keep that strong, opaque finish.
If you’re experimenting with more fluid effects or want something a bit different, Yupo paper like the Art Spectrum Yupo Paper Pad lets colour sit on the surface and move in unique ways.
Brush pens also prefer smooth paper, especially for lettering, so the tip stays sharp and your lines stay clean.
Tips From the Shed
Before you commit to a full piece, always do a quick test on scrap paper. It sounds basic, but it’ll save you from a lot of “why does this look different?” moments.
Match your paper to your medium. This is the one that changes everything. The right paper can make an average pen feel amazing, and the wrong paper can make a great pen feel… not so great.
Store your markers horizontally where you can. It helps keep the ink evenly distributed, especially with dual-tip markers.
If you’re using paint pens, give them a proper shake before you start. You want that pigment fully mixed so your colour comes out smooth and consistent.
Keep an eye on your nibs too. If they start to wear down or fray, replacing them (if the brand allows it) can bring your pen back to life.
And finally, don’t write a pen off too quickly. If it’s not performing how you expected, try it on a different surface first. A lot of the time, it’s not the pen, it’s what you’re using it on.
.png)
Frequently asked questions about pens and markers
Are alcohol markers better than paint pens?
It really depends on what you’re trying to create. Alcohol markers are great for smooth blends and gradients, while paint pens are better for bold, opaque colour and working across different surfaces.
Do alcohol markers bleed through paper?
Yep, most of them will. Because they’re solvent-based, the ink travels through the paper. Using bleedproof marker paper and placing a spare sheet underneath helps manage it.
Can you use paint pens on paper?
You can, just make sure it’s sturdy enough. Heavier paper or cardstock will give you much better results, while thinner paper can warp or start to pill.
Are brush pens the same as markers?
Not quite. Brush pens use water-based ink and flexible tips for line variation, while alcohol markers use dye-based ink and are more focused on filling and blending.
What paper is best for Posca?
Smooth, non-absorbent surfaces work best. Things like Yupo or heavier, smooth cardstock help keep colours bold and prevent that patchy, peeling effect.
Can kids use alcohol markers?
They can, but it’s a good idea to have some supervision because of the solvent fumes. For younger artists, brush pens or water-based paint pens are usually a bit more beginner-friendly.
Do paint pens fade over time?
Good quality, pigment-based paint pens are generally quite fade-resistant, especially compared to dye-based markers.
Can you blend paint pens?
They’re more about layering than blending. You can build colours on top of each other, but you won’t get the same soft gradients as alcohol markers.
Which markers don’t bleed?
Water-based brush pens tend to bleed less than alcohol markers, but they can still feather depending on the paper. The surface you use plays a big role here.
What’s the best pen for beginners?
Brush pens and paint pens are usually the easiest place to start. They’re more forgiving, easier to control, and don’t rely as heavily on blending technique.
.png)
Final Thoughts
If there’s one thing to take away from all of this, it’s that no pen is “better” than the other, they just do different jobs.
Alcohol markers are your go-to for smooth blends, soft gradients, and that polished, rendered look. Paint pens bring the punch, bold colour, strong coverage, and the ability to work across all sorts of surfaces. And brush pens sit right in their own lane, perfect for expressive lines, lettering, and clean, controlled strokes.
A lot of the magic doesn’t just come from the pen itself, it comes from how you use it, and what you use it on. The right technique and the right paper can completely change your results.
So if something’s not quite working, don’t be too quick to ditch the tool. Try switching up your surface, adjusting your approach, and giving it another go.
Once everything clicks, that’s when it gets really fun.
